






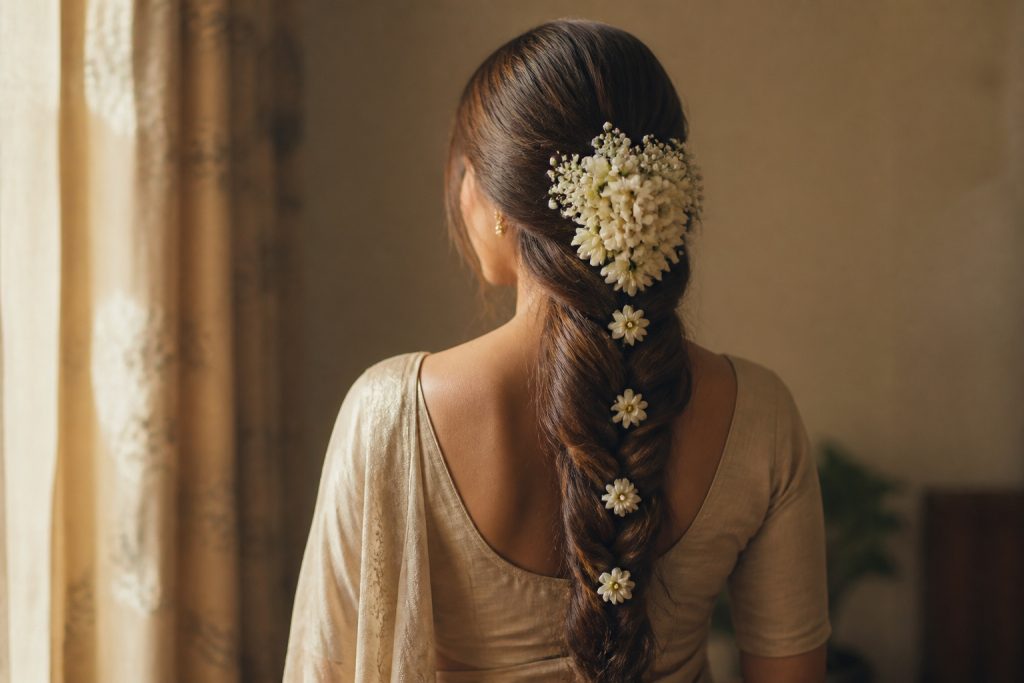

When I first tried to learn how to decorate bridal choti with flowers my jasmine garland fell apart by 3pm and an aunt asked if the flowers were fake. That day taught me that prettier does not mean looser. I switched to a tight, anchored braid, mini elastics every few inches, and a simple thread-and-needle technique for the blooms. The result stayed intact through photos and the evening reception.
This is a long-hair bridal choti look that reads traditional but stays clean. Plan for about 45 to 75 minutes depending on practice. It suits waist-length to mid-back hair, medium density, and straight to slightly wavy textures best. If your hair is finer, clip-in extensions are a sensible, affordable fix. I used mostly inexpensive pins and one small splurge on a ceramic wand.
A sleek base that holds flowers
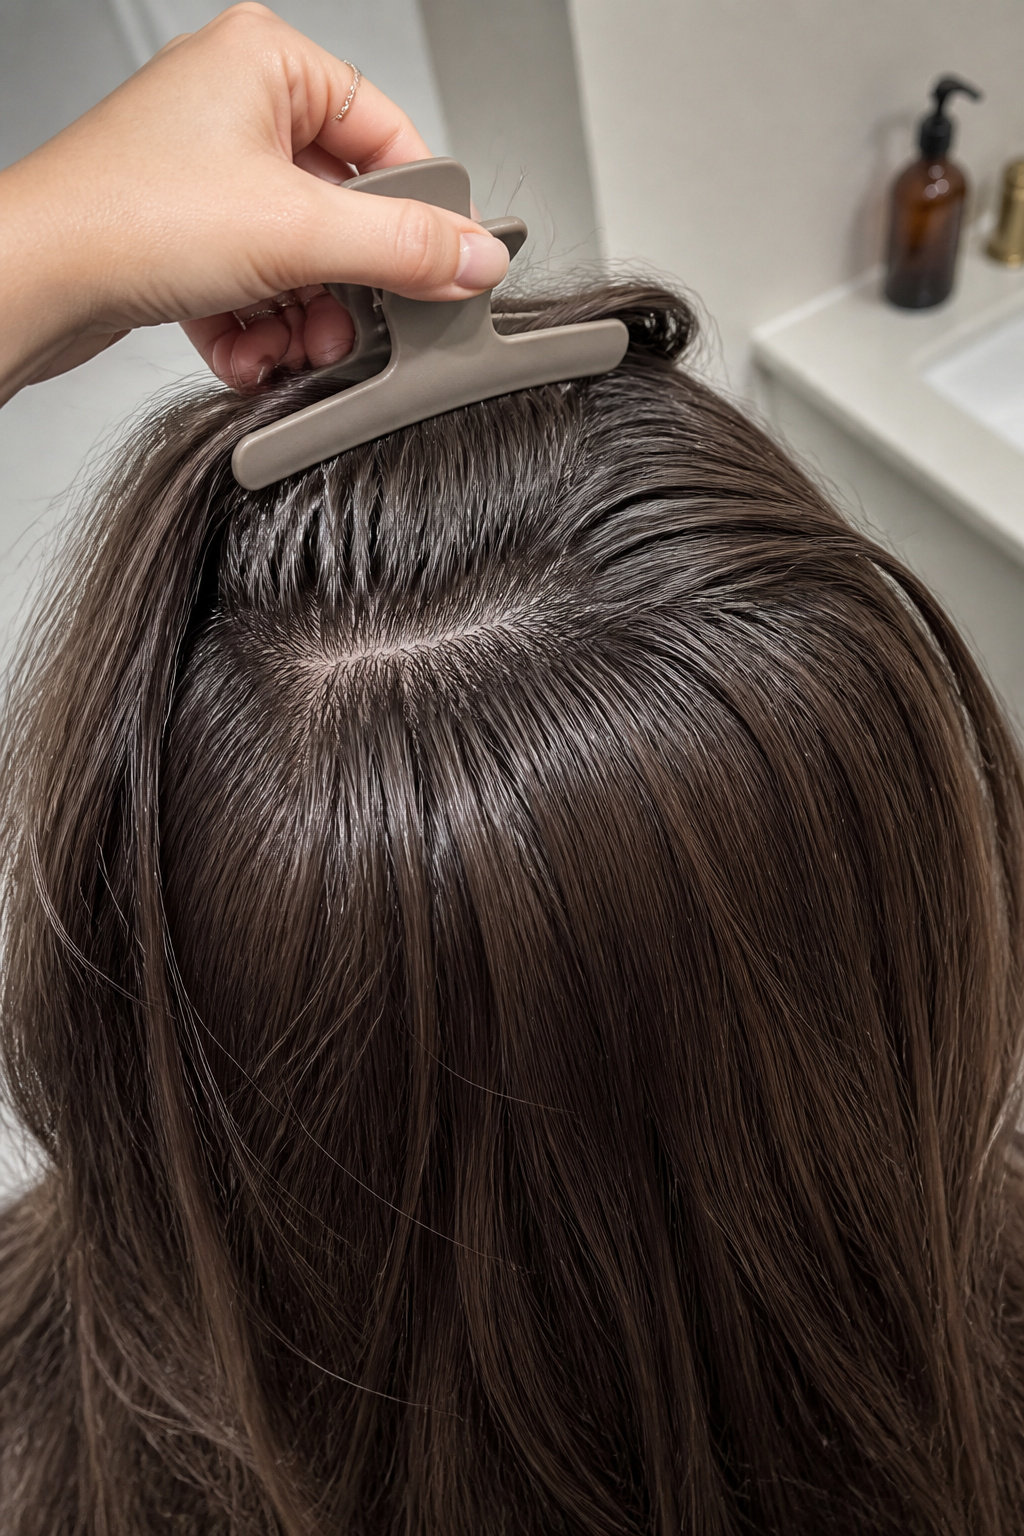

Prep decides whether the floral work looks tidy or sloppy, so I smooth and add grip first. I work an alcohol-free volumizing mousse through damp roots only, about a golf-ball-sized amount for waist-length hair, because the ends need movement not stiffness. I follow with a coin-sized drop of a lightweight serum on the mid-lengths to ends to tame frizz.
A heat protectant goes on section by section before any hot tool. I rough-dry to about 80 percent so the hair is warm but not steaming. The biggest mistake here is styling while hair is still damp. It makes waves drop and flowers slip when humidity hits.
If you want a sleek finish, blow-dry with a round brush, directing hair down toward the nape. For a lived-in look, skip the full brush out and keep a touch of texture at the ends.
A braid that stays put and looks full
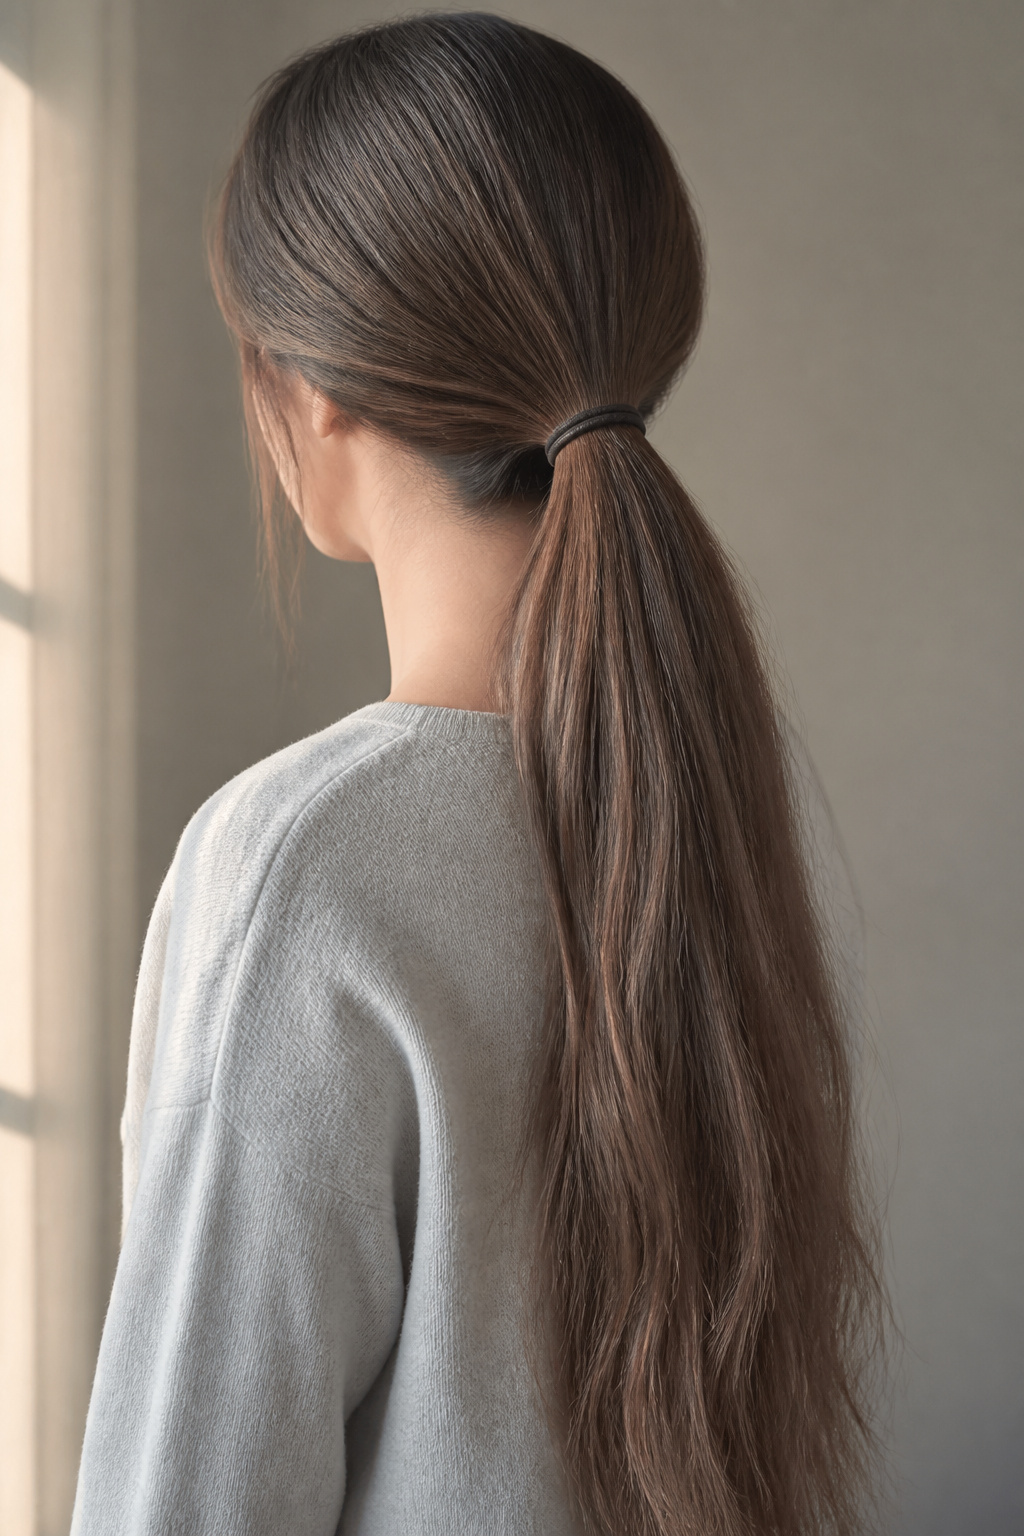

Start with a sleek low ponytail at the nape. Use a strong elastic and then split the pony into three equal sections for a three-strand braid. Braid tightly from the roots down about two inches, then add a mini elastic every 3 to 4 inches along the braid. Those little elastics stop the braid from sliding and give discrete anchor points for flowers.
To create bridal volume without bulk, pull each braid segment outward gently with your fingertips, not a comb. The goal is an even, pillowy silhouette rather than frizz. If you need extra thickness, clip-in extensions placed under the braid before you begin will sit invisible and make the braid photograph better.
A common error is starting the braid too low on the head. Anchor it at the nape so the floral line is visible in photos and does not disappear under a dupatta.
Flowers woven and pinned so they do not drop
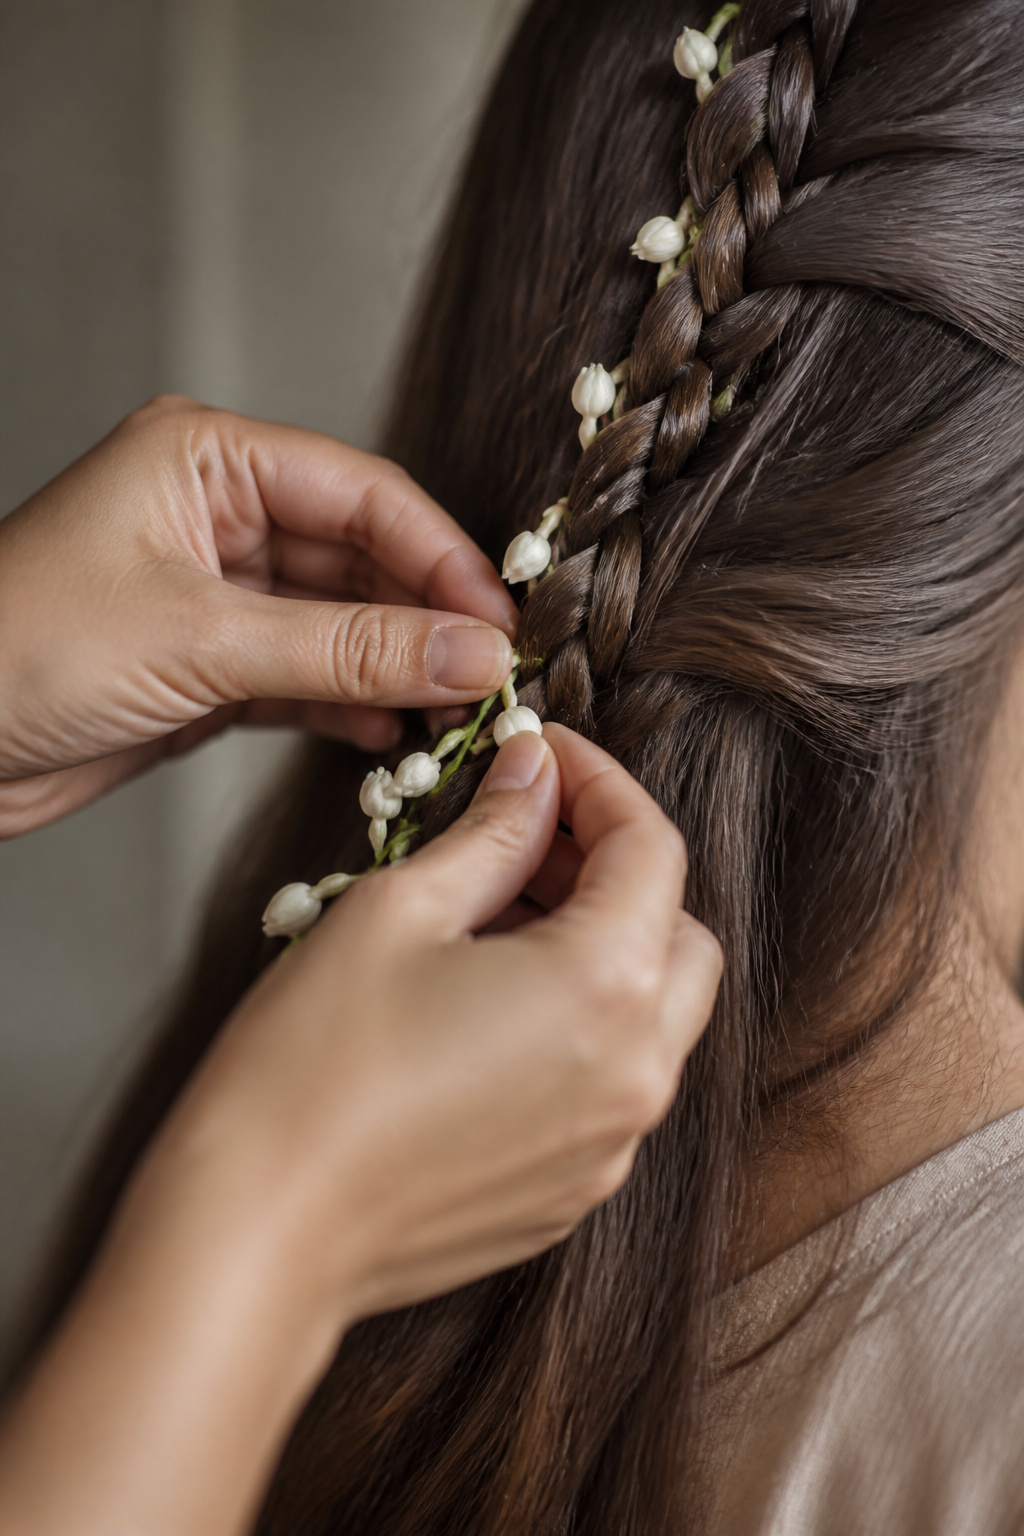

This is the step that separates messy from deliberate. I prefer small clusters spaced evenly rather than one heavy garland. For each cluster, cut 2 to 4 jasmine sprigs or a 1-inch baby’s breath posy, lay them against the braid, and secure with an invisible pin inserted parallel to the braid so the pin rides along hair, not through the flowers.
For an extra-secure hold on heavy blooms, thread a curved needle with strong nylon thread, pass it under a braid strand, loop the flower stem through, and stitch twice back into the braid. The thread hides inside the plait and prevents slippage far better than pins alone.
Place flowers on alternating sides every 3 to 4 inches so the silhouette stays balanced. The mistake I made early on was pinning every bloom directly on top; they topple forward. Tuck them slightly into the braid’s outer edge so they read integrated, not pasted on.
Soft face framing and clean back for photos


Finish the look by pulling two soft tendrils at the temples. Use a 1.25 inch ceramic wand, wrap hair away from the face for loose S-shape waves, and brush gently with fingers. Keep the barrel at medium heat, about 350 degrees F for my texture, and one-second holds for each piece to avoid a tight ringlet.
Spritz a light flexible-hold hairspray over the entire braid from about 8 to 10 inches away so the flowers and braid get hold without becoming stiff. If temple jewelry or a veni will be added, anchor it into the braid with long bobby pins crossing in an X pattern for extra security.
Avoid overworking the front. Too many pins there stiffen your profile. The clean back and soft front create contrast that photographs well.
Common styling mistakes to avoid
Pinning flowers on top of frizz. Why it fails: pins slip and flowers slide forward. Better: smooth base, pin parallel to the braid, and tuck blooms into the braid edge.
Using one long garland across a loose braid. Why it fails: weight pulls the braid open mid-event. Better: spacing small clusters and stitching heavier blooms inside the plait.
Skipping mini elastics. Why it fails: braid migrates and flowers lose anchor points. Better: add mini elastics every 3 to 4 inches to lock structure.
Over-spraying at close range. Why it fails: stiff hair kills natural movement. Better: spray from distance and focus on the braid base, not each bloom.
How to make it last
Flowers usually wilt at the ends first, and the braid loosens at the midpoint where movement is greatest. To refresh, gently re-tighten a few outer sections by sliding a bobby pin under the braid and nudging the segments back into place. For jasmine or mogra, mist the flowers lightly with cool water from a distance and store spare stems in a zip bag in a cooler until you need them.
If a bloom falls, keep a tiny kit with spare pins and two pre-prepared baby’s breath posies. Replacing a 1-inch posy is quick and blends in. By 9pm the look will soften; plan touchups only if you want it camera-ready through late-night photos.
What you'll need for this look
Heat tools
- 1.25 inch ceramic curling wand, barrel ($30 to $70). Worth spending on because a good wand lasts years.
- Large matte hair dryer, ionic, 1800 watts ($40 to $120).
Styling products
- Alcohol-free volumizing mousse, 8oz ($10 to $25). Use at roots only.
- Lightweight shine serum, 1oz ($8 to $20).
- Heat protectant spray, 6oz ($8 to $20).
- Strong-hold hairspray, 8oz ($10 to $25).
Accessories and finishing
- Mini hair elastics, pack of 100 ($5 to $12). I use these every 3 to 4 inches.
- Long bobby pins, black, pack of 50 ($6 to $15).
- Pearl hair pins, decorative pack ($8 to $30).
- Matte claw clip, large ($5 to $15).
- Floral wire, green 20 gauge, 20ft ($6 to $12).
Budget swaps
- If you want to avoid extensions, use a looser braid and gently tug for volume rather than buying clip-ins.
- Fresh jasmine is best from your local florist the morning of the wedding. If sourcing fresh is difficult, small artificial posies can be wired in as a backup.
Where to start if you only change one thing
If you do one thing differently, add mini elastics every 3 to 4 inches on the braid. That single change stops most movement, gives you reliable anchor points for flowers, and keeps the silhouette neat for photos. Did you try a flower-covered braid that fell apart? Tell me which flower and what went wrong and I will suggest a fix for your hair type.


