






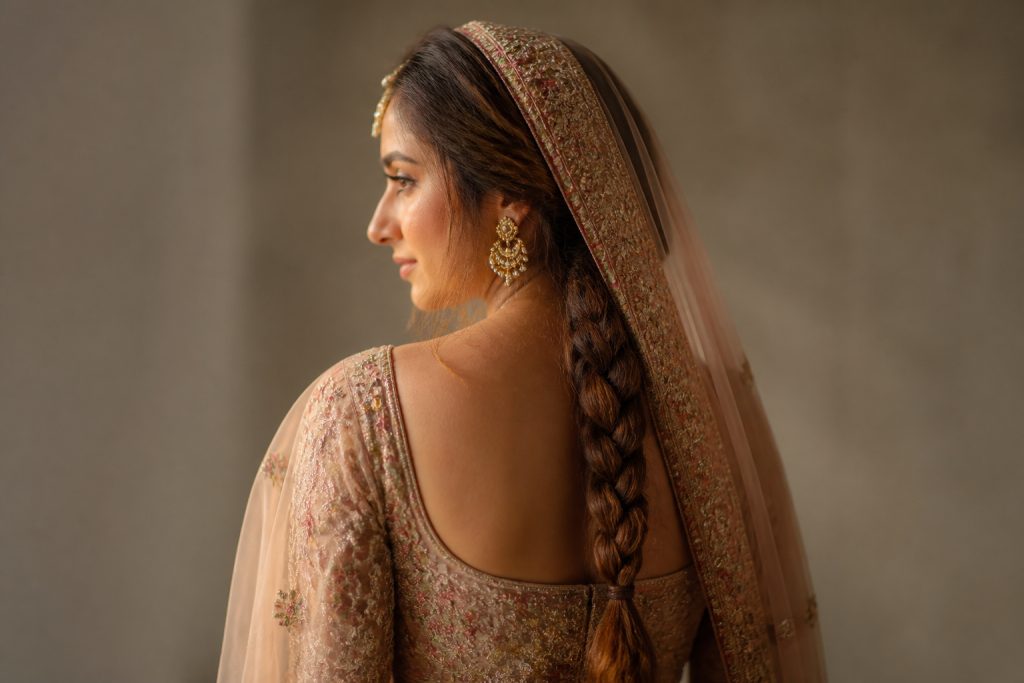

My dupatta slid off during sunset photos at my cousin’s wedding, and I remember the photographer whispering that the pins showed in every close-up. Learning how to secure bridal choti under dupatta became the thing I practiced until it stopped ruining pictures. The fix was structural: a tight low braid, hidden comb clips, and weight distributed to the blouse and shoulders.
This is a practical bridal choti and dupatta method for mid-back to long hair that holds through dancing and wind. It works on straight, wavy, and thicker curls; for very short hair I give alternatives below. You can do the basics on a budget, or have your seamstress sew in comb clips for a cleaner finish at a small cost. I favor invisible hardware over visible pins because the camera does not forgive a glint.
Prep the hair so the choti has grip
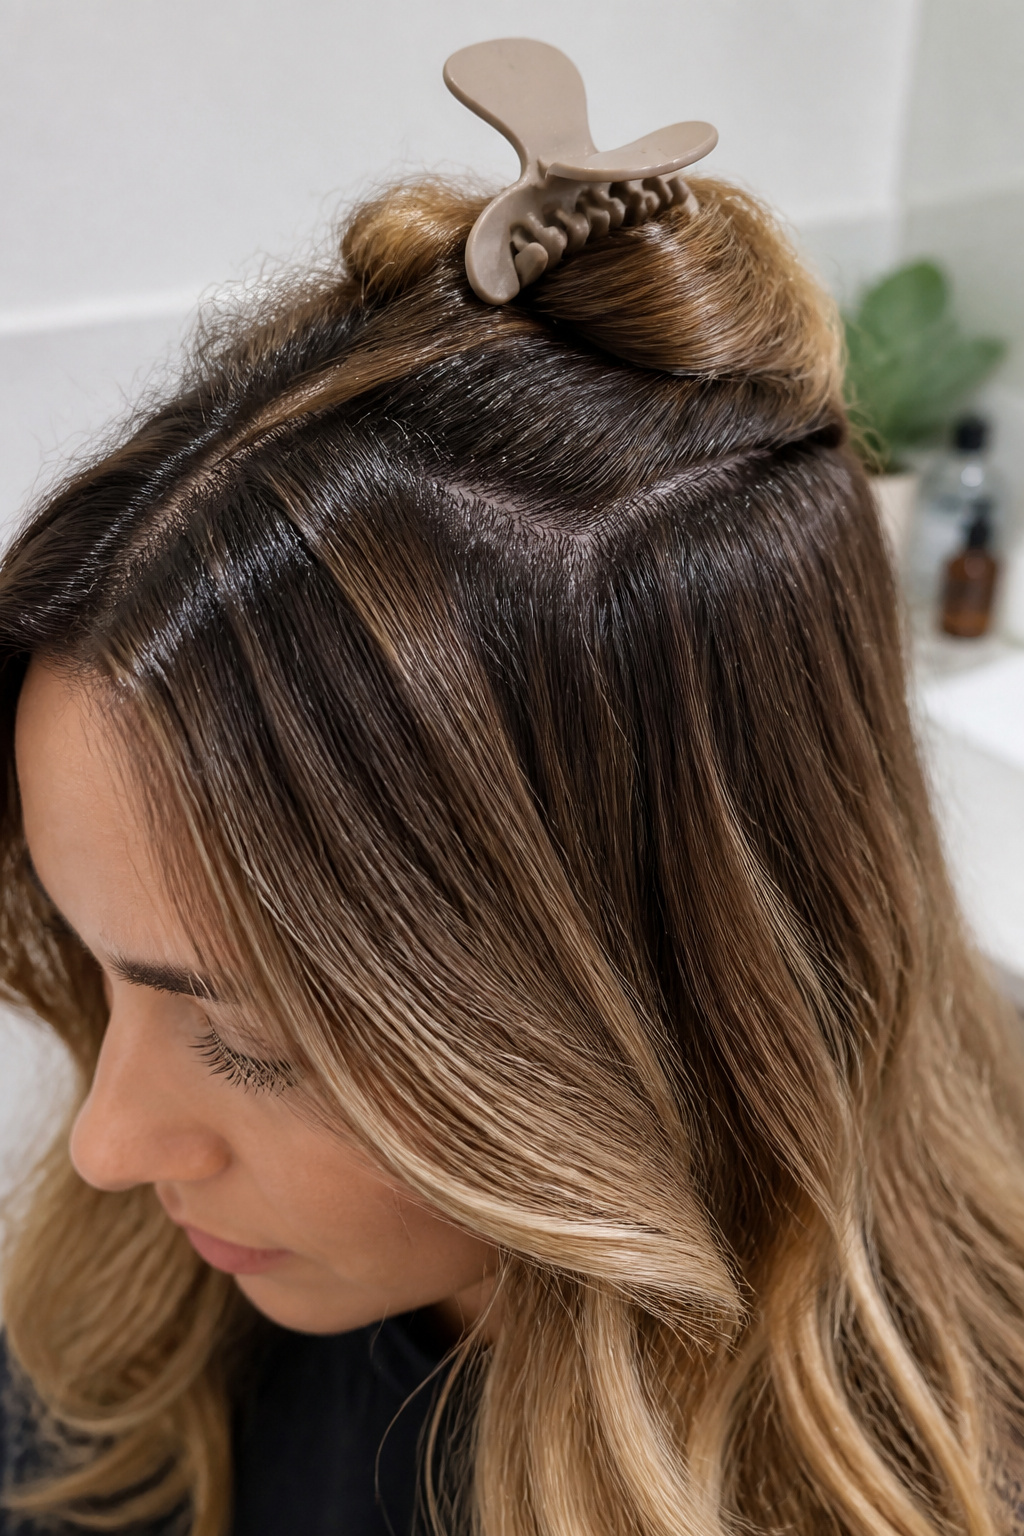

Prep decides how long the style holds, so this step comes first. On damp hair I work a golf-ball-sized amount of Alcohol-free volumizing mousse, 8oz into the roots only, about one inch of hair from the scalp. The ends stay untreated so they move and look soft.
Spritz a light layer of Heat protectant spray, 6oz mid-length to ends and rough-dry to about 80 percent. If you start hot tools on damp hair the wave will steam out and loosen fast. I use medium heat on my wand and dryer so the hair sets without getting brittle.
Big mistake here is overloading with product. Too much mousse and the braid looks heavy and matte in photos. Keep product to the root band and one light mist on lengths.
Build a low, tight braid base that becomes the choti
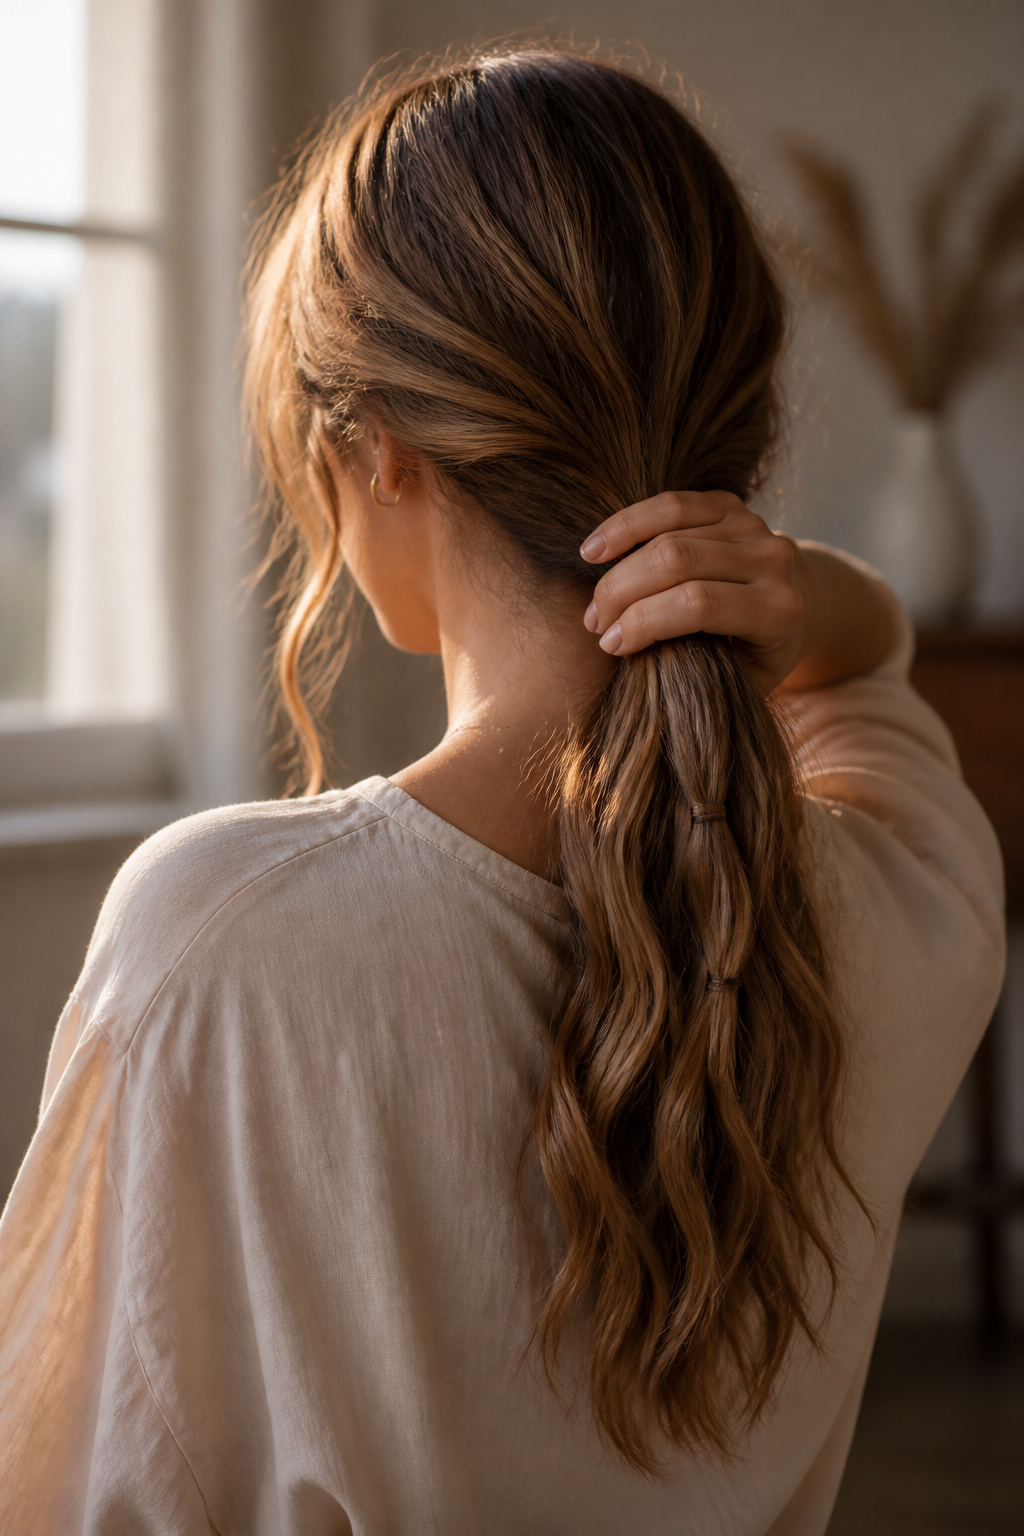

A firm base is the key reason the dupatta stays put. Pull the hair to a low nape ponytail, smoothing the crown with your fingers. Use a small elastic about 1 inch below the hairline so the braid starts close to the scalp. For thick hair I split the pony in half and wrap the tail once with an extra elastic so nothing slips.
Braid tightly with three even strands for at least 10 to 12 inches, keeping the braid compact rather than loose. Secure with a mini elastic. If your hair is layered, add two slim support braids along the skull—about finger-width each—so combs have something to grip.
The visual principle is a narrow, anchored column. That column sits under the dupatta border and resists pull. The main error is leaving the braid too loose; it will pancake under the dupatta and let pins show.
Add hidden anchors and seat the dupatta
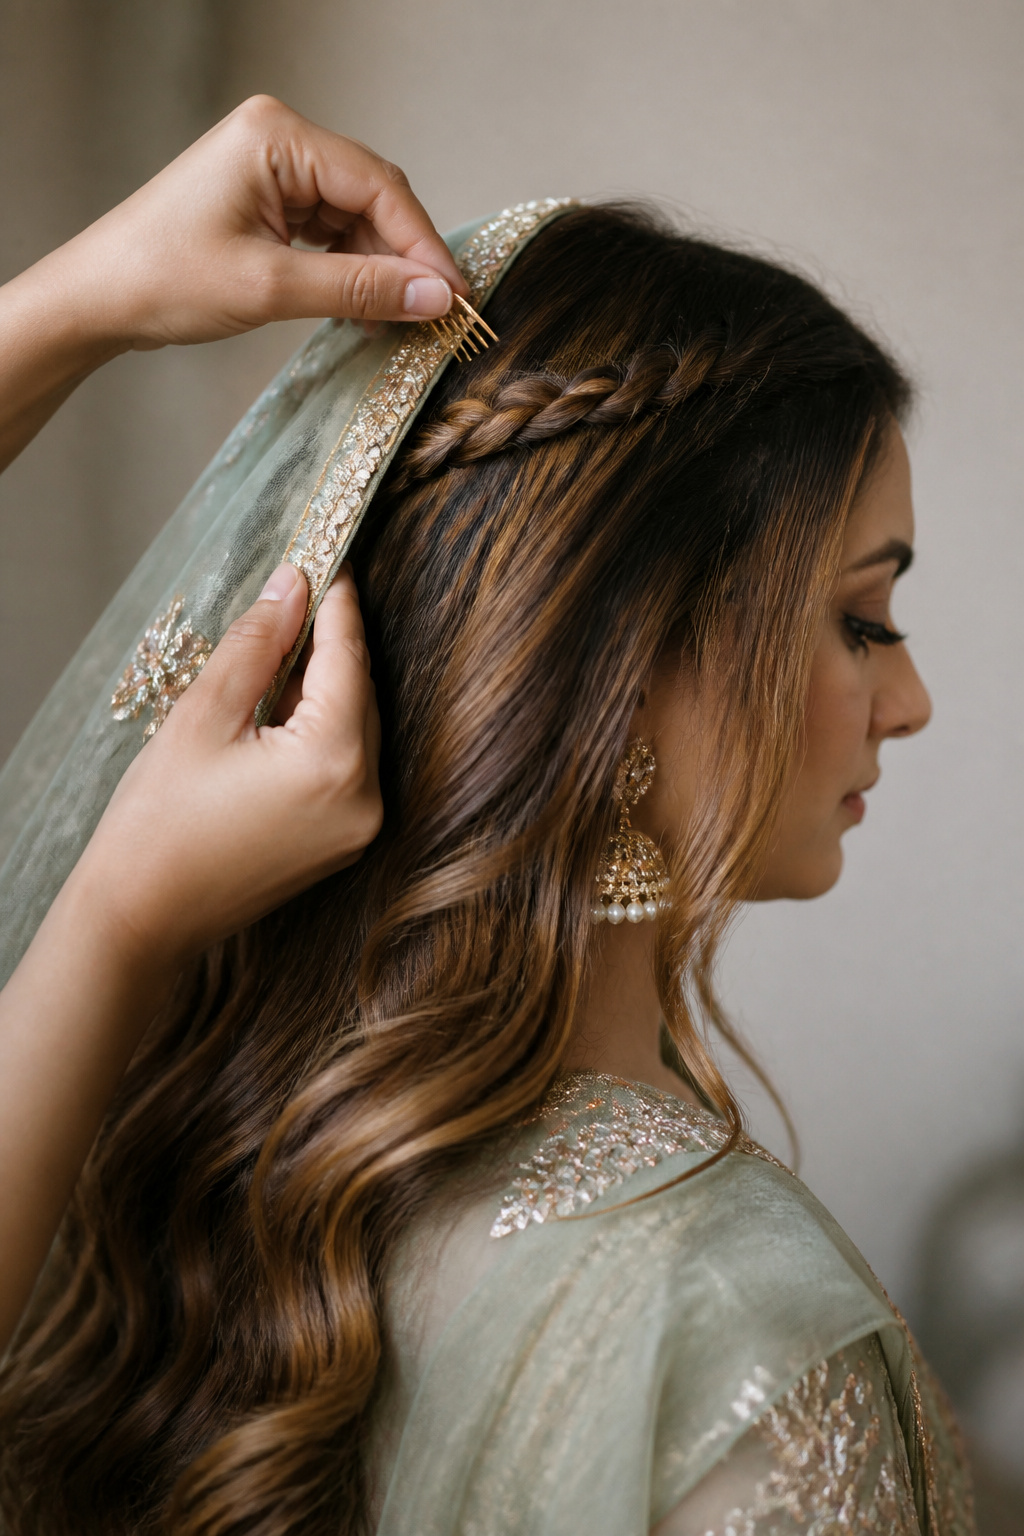

I prefer sewing tiny comb clips under the dupatta border and clipping them into the hair just above the braid. Slide the comb teeth upward against the scalp, then rotate it slightly forward so the comb locks onto hair rather than the fabric. Use two combs spaced about 1.5 to 2 inches apart to create a hidden rail.
If you do not have sewn-in combs, anchor the edge with crossed bobby pins under the hairline, working the pins into the braid’s top knot so they are covered. Add shoulder support with a small safety pin into the blouse seam on each side to take the weight off the head.
A common misstep is pinning through the dupatta border on the outside; you can see those flashes of metal in profile. Conceal everything under the hairline or inside the blouse for clean photos.
Final conceal, finish and motion test
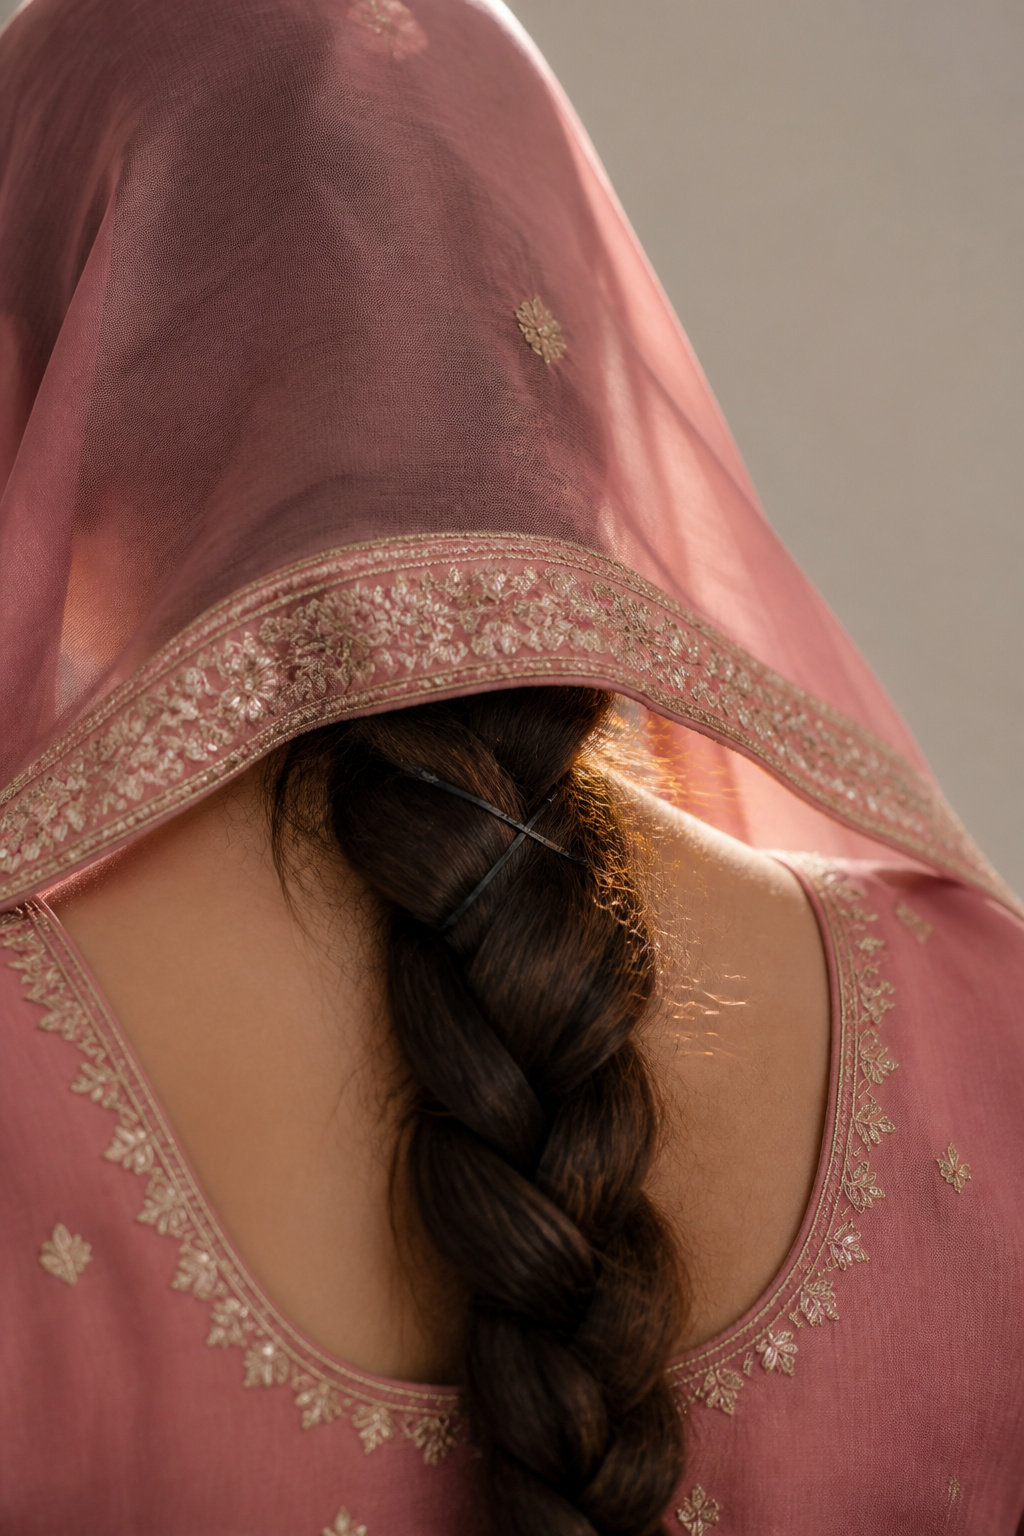

Tuck any visible pin heads into the braid or under a small loop of hair. Spray a light mist of Strong-hold hairspray, 300ml over the crown and along the edge to set pleats without making them crunchy.
My test is simple: raise both arms straight for three slow counts and then shimmy my shoulders. If the dupatta slides, add a safety pin into the blouse seam or another comb clip near the temple. I learned the hard way that one pin at the crown is overrated; always use multiple supports for heavy fabric.
The last mistake to avoid is over-pleating at the forehead. Keep pleats soft so they read as deliberate, not forced.
Common Styling Mistakes to Avoid
Visible pins. Pinning on the outside of the dupatta or across the border creates tiny bright spots in photos. Pin under the hairline and into a braid or blouse seam instead.
Single-point anchoring. One crown pin takes the full load and will fail during movement. Spread the support across combs, shoulders, and a waist belt when the fabric is heavy.
Overuse of product at the ends. Heavy mousse or too much serum flattens the braid and makes the dupatta slip instead of grip. Save product for roots and a light mist on lengths.
Forgetting to motion-test. You need a five-minute dance simulation. I skipped this once and re-pinned between courses.
How to make it last
Expect the crown volume to soften first and small flyaways to appear by mid-reception. Refresh by pinning a loose tendril behind the ear and dabbing a coin-sized drop of lightweight shine serum, 30ml on fingertips to smooth only the frizziest pieces.
If the braid loosens, you can tighten the top 2 inches by sliding a spare elastic over the braid under the dupatta and tucking the excess elastic into the hair. For heavy dupattas, use the bridal elastic waist belt to take the load off the head; it makes the style survive hours of standing and dancing.
Keep a small emergency kit with extra bobby pins, a couple of rust-proof safety pins, and a mini sewing needle to reattach a clip if needed.
What you'll need for this look
Heat tools
1.25 inch ceramic curling wand ($35 to $80). Good for soft waves that feed into a neat braid.
Professional blow dryer 1875W ($30 to $150). Worth spending on if you style often.
Styling products
Alcohol-free volumizing mousse, 8oz ($10 to $25). Use at roots only.
Texturizing spray, 4oz ($10 to $25). Adds grip without crunch.
Strong-hold hairspray, 300ml ($8 to $20). Final lock.
Care and protection
Heat protectant spray, 6oz ($8 to $20).
Accessories and finishing
Bobby pins, 100 pack ($5 to $12). Use matched to your hair color.
Rust-proof safety pins, 20 pack ($5 to $12). For blouse and shoulder anchors.
Mini comb clips, 6 pack ($6 to $18). Sew these under the dupatta border for clean hold.
Mini hair elastics, 100 pack ($5 to $10). For braid tails and small support braids.
Bridal elastic waist belt, slim ($12 to $30). Distributes weight for heavy dupattas.
Sew-on blouse hooks, 20 pack ($6 to $15). Use to attach dupatta to the blouse for hands-free wear.
If you are on a tight budget, buy the bobby pins, safety pins, and a small pack of mini elastics offline; they are cheaper at local shops.


Where to start if you only change one thing
If you do one thing, have tiny comb clips sewn under the dupatta border and clip them into a tight low braid. That single change removed the slipping and the visible pins for me. If your seamstress can’t sew them, bring a small pack of Sew-on blouse hooks, 20 pack and ask to add two hooks to the blouse shoulders. Tried this and it saved my photos. What part of the pinning feels hardest for you?


