








The first time I pulled this high messy bun together I was aiming for “I barely tried” and somehow ended up getting three compliments before lunch. messy bun hairstyles are shockingly forgiving once you know a few small tricks. Below are 15 looks I actually wear, from quick top knots to braided low buns, and why each one works for different lengths and textures.
These are low-effort and mostly second-day-hair friendly. You’ll see styles for long, medium, curly, and fine hair, a couple that are best for short bobs, and honest tips on what usually fails. Expect five- to ten-minute routines for most looks.
15 Messy Bun Hairstyles for the Pretty, I Barely Tried Look
High messy bun with face-framing tendrils
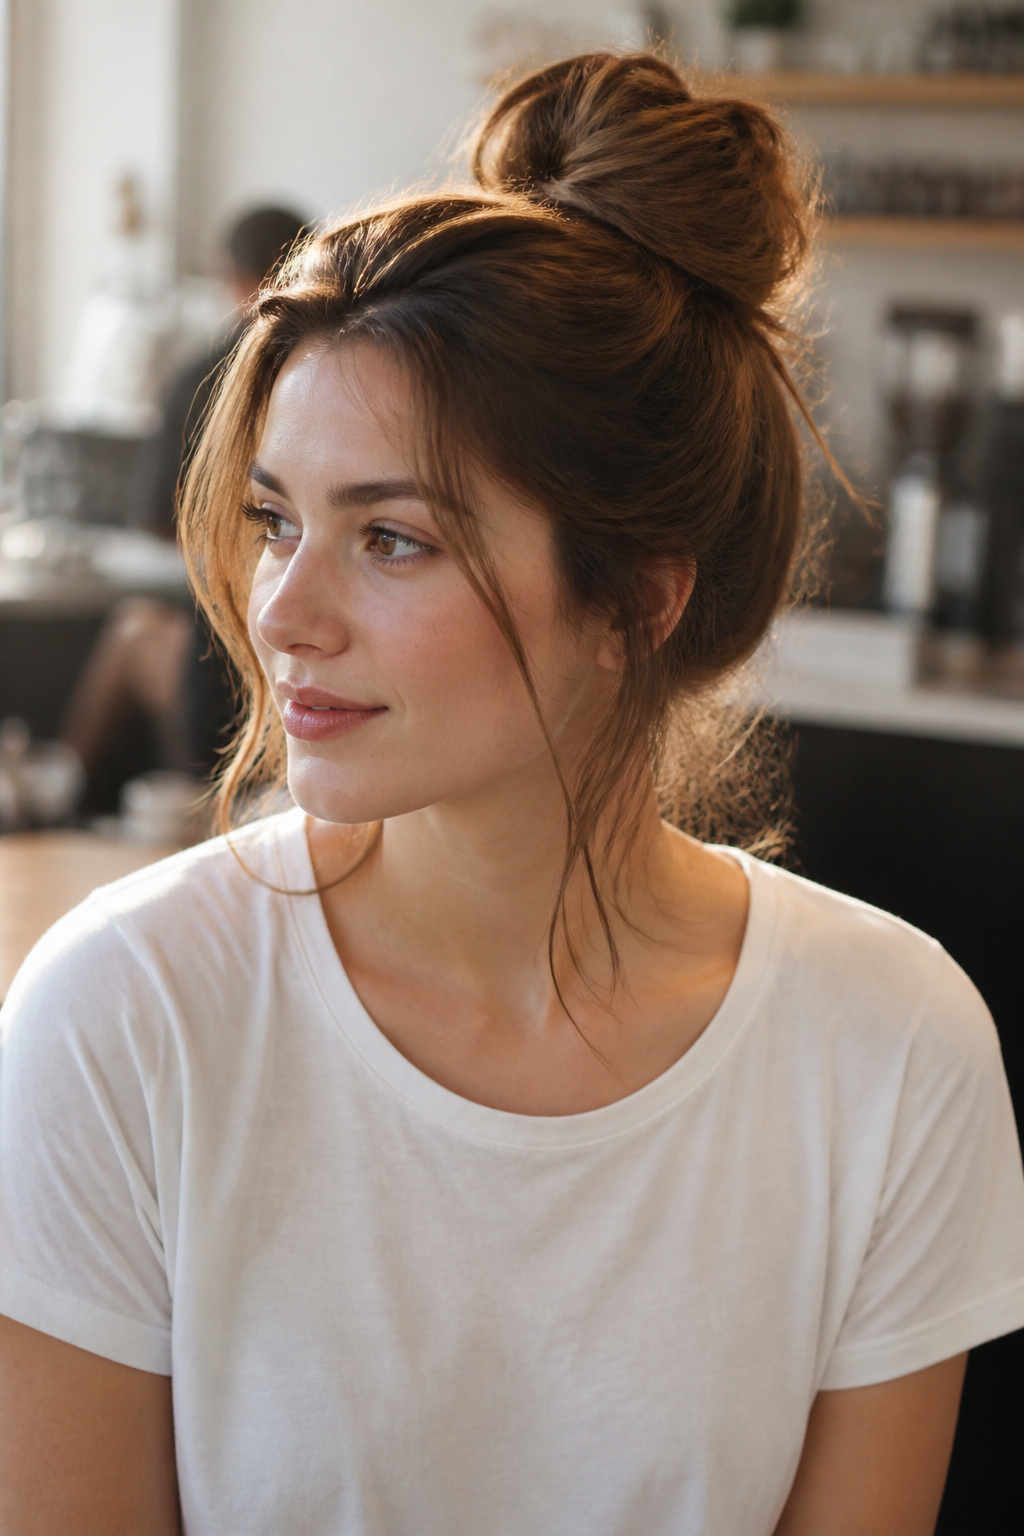

Best for medium to long hair. Trim layers every 12 weeks. About 5 minutes each morning.
This is the default messy bun I reach for when I need something quick that still reads polished. The payoff is volume at the crown with softness around the face, which flatters most face shapes. The trick is looping the hair through one time and leaving the ends out before tucking lightly, so the bun reads deliberate rather than sloppy. Common mistake: pulling everything too tight. Leave the crown a little loose and pinch to create height.
Low messy bun with a loose nape finish
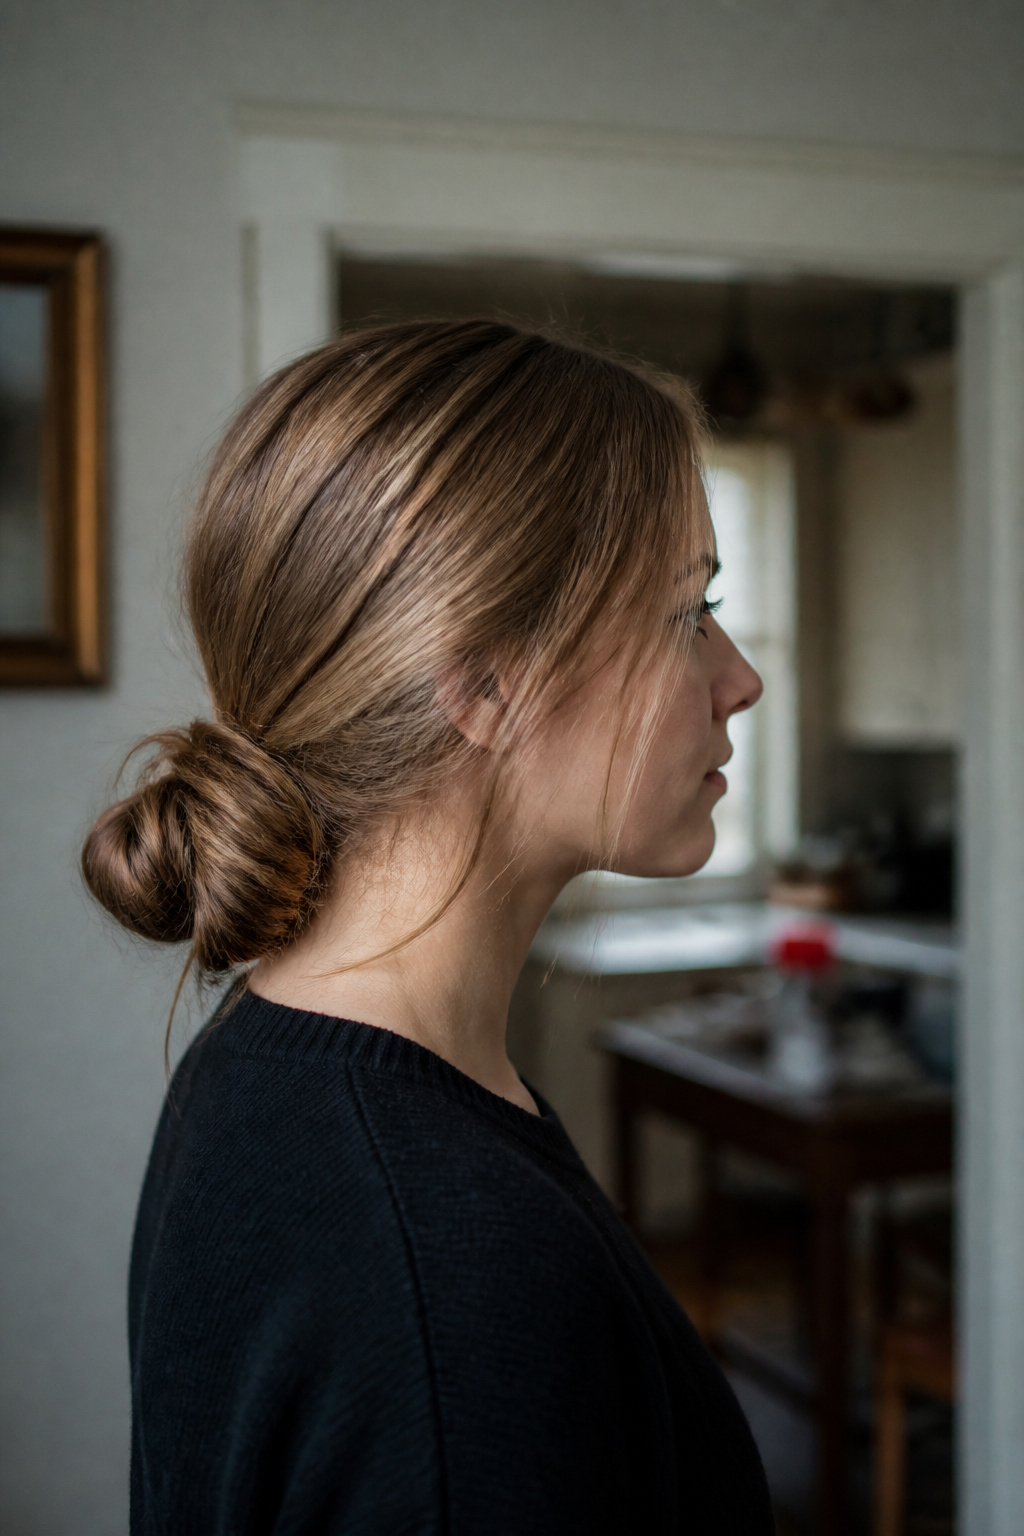

Best for medium to long hair. Holds well on second-day hair. About 6 minutes.
A low messy bun looks less done-up and survives a workday better than you think. It elongates the face and avoids crown collapse in wind. I tuck sections into a loose knot at the occipital bone and secure with hair pins, then pull a few strands at the temples to soften. Mistake to avoid: over-spraying for hold and losing the undone texture. Use a texturizing spray sparingly so pieces still move.
Messy top knot with crown volume
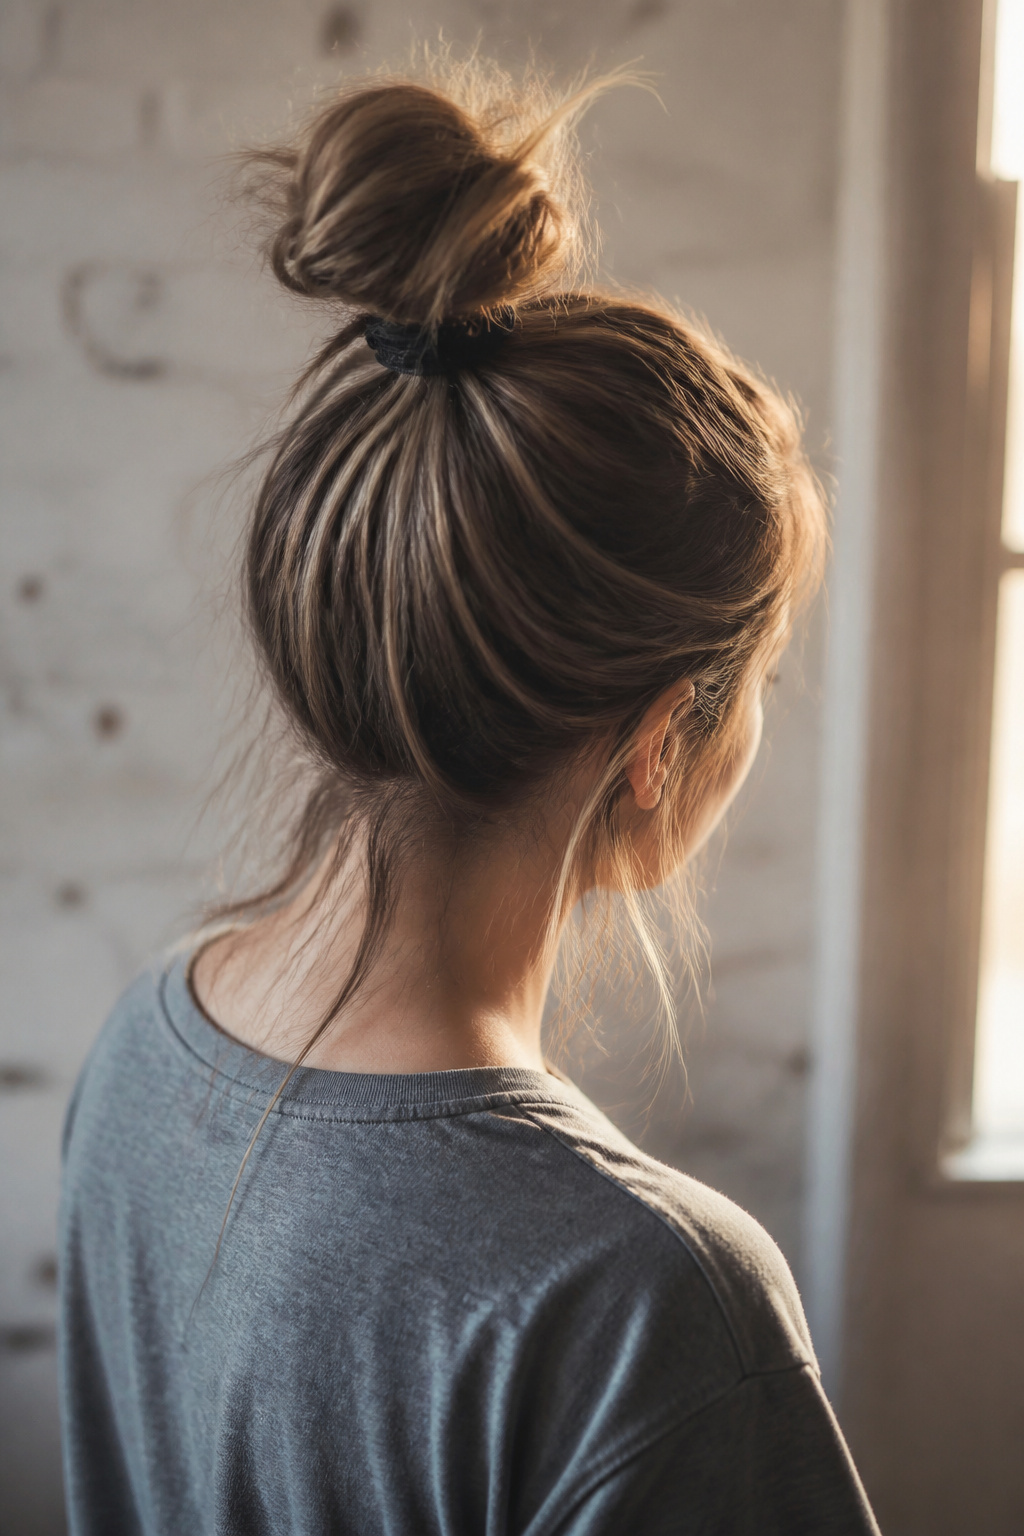

Best for medium to long hair. Style on day-two hair. About 4 minutes.
This one amps the “effortless” look by giving the crown lift without looking heavily teased. I tease only the roots and use a large scrunchie as a base so the bun keeps shape. If your hair is freshly washed the knot collapses, so save it for second-day hair. Honest moment: I once used too much dry shampoo and got chalky streaks—the product matters.
Off-center messy bun with side-swept softness
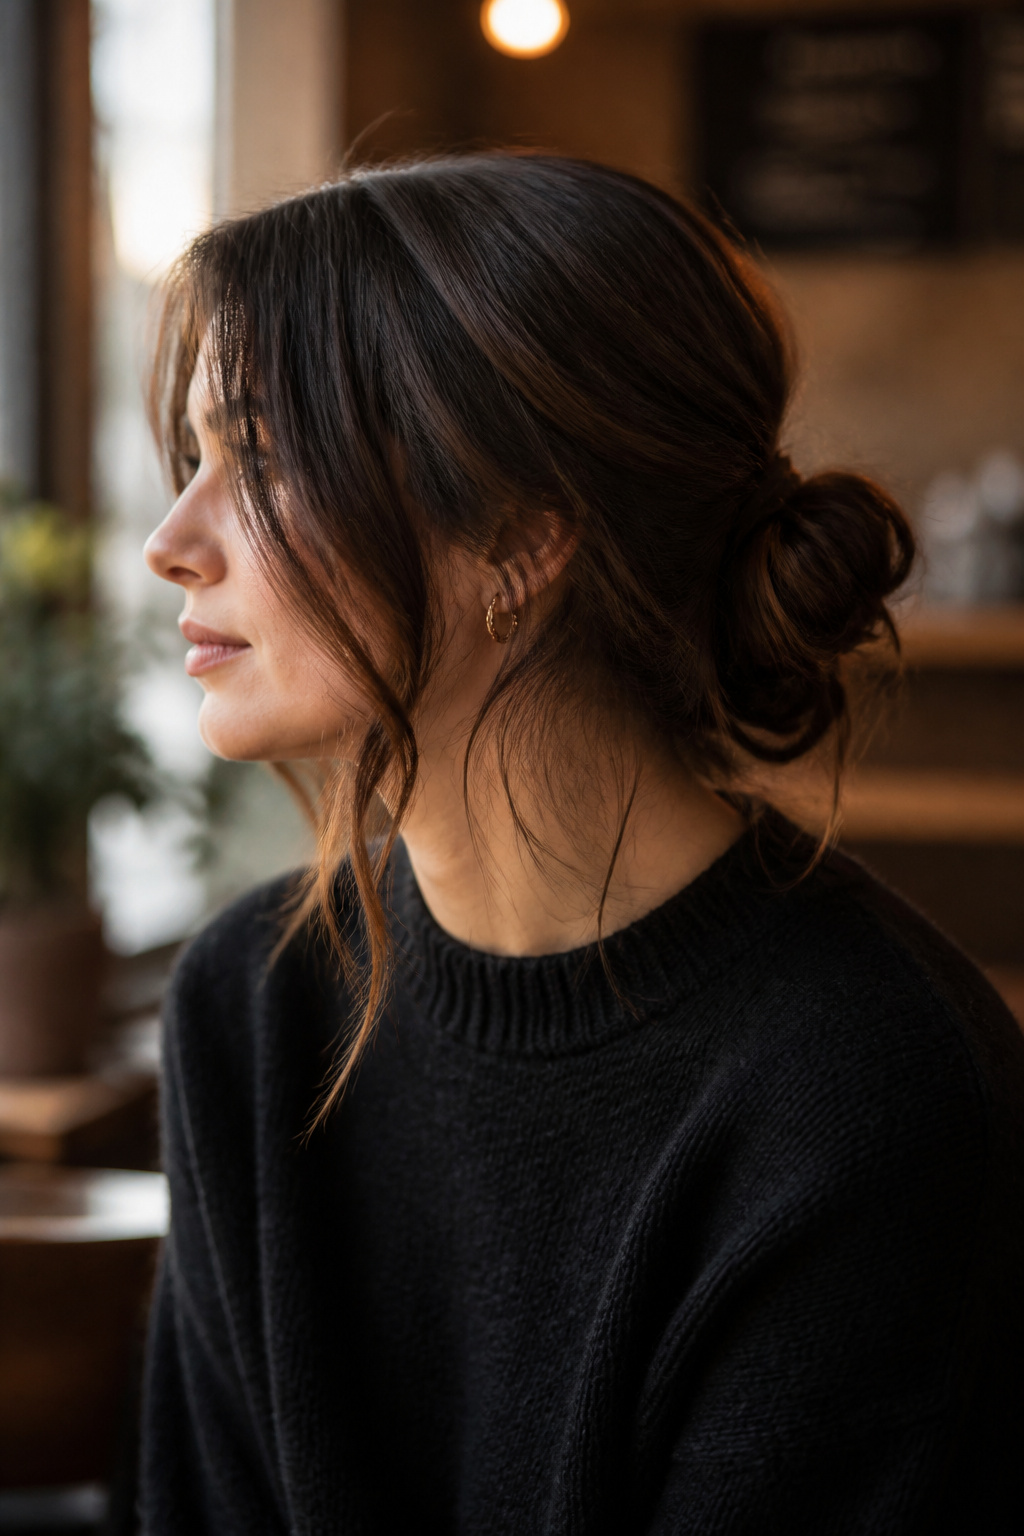

Best for medium hair. Grows out gracefully. About 7 minutes.
Placing the bun slightly off-center makes a simple updo feel editorial. It softens symmetrical faces and creates a flattering sweep across the forehead. The technique is to pull the pony slightly to the side and wrap loosely, leaving a heavier tendril on the opposite side. Many people get this wrong by centering the bun; symmetry kills the intended casualness.
Messy bun with doubled side braids feeding in
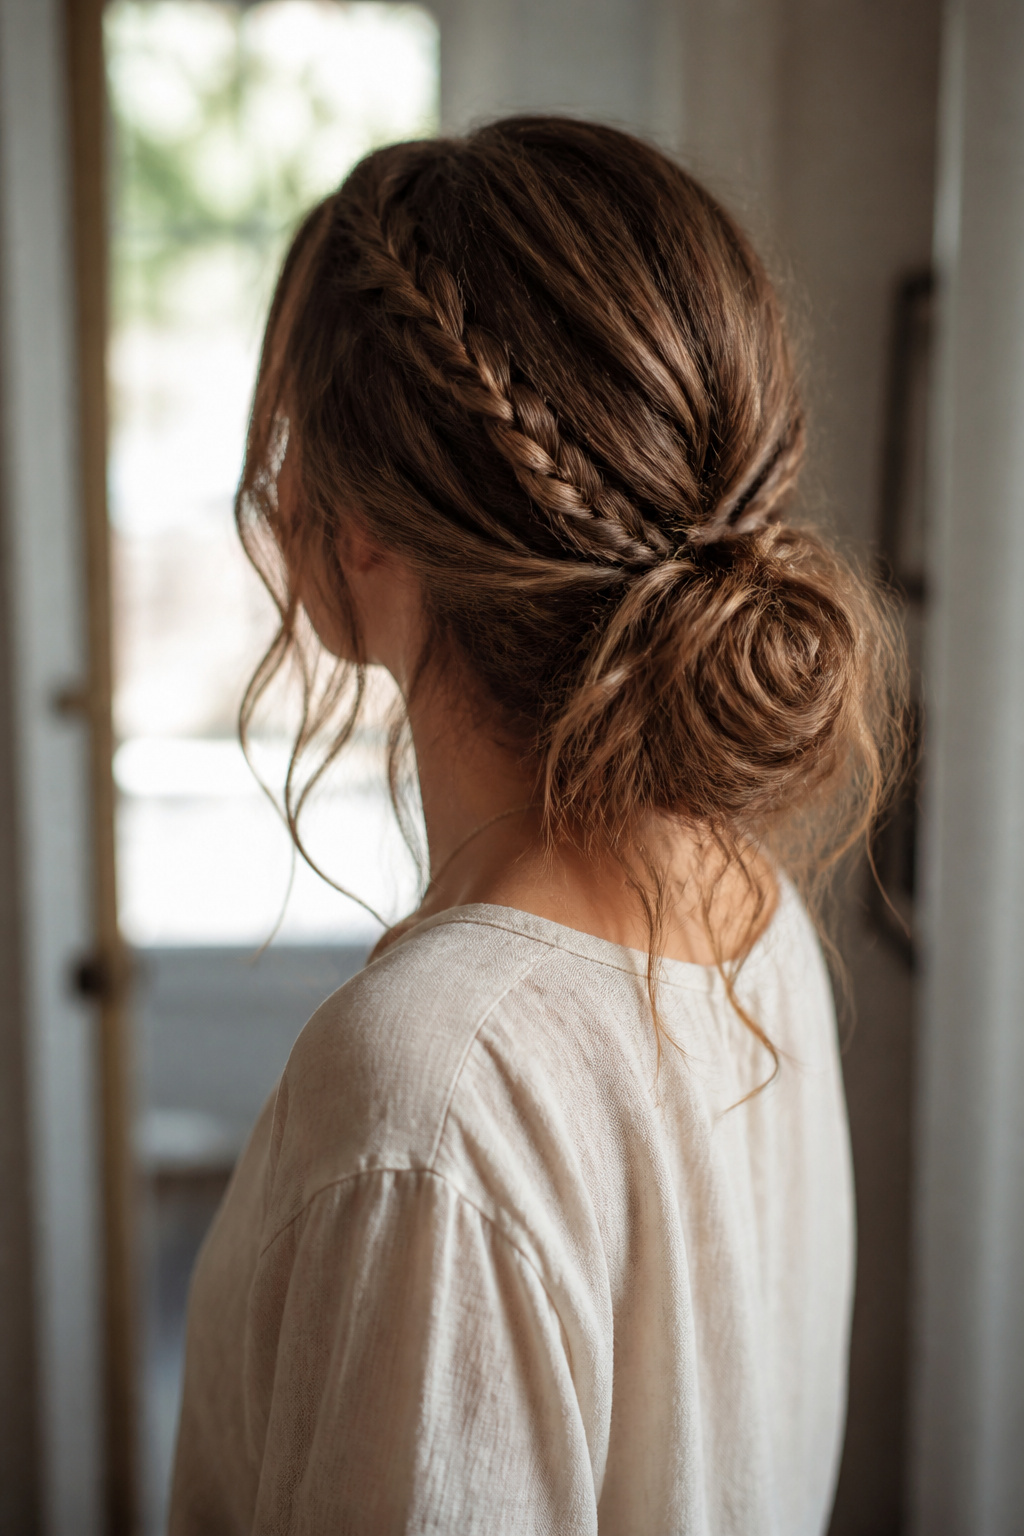

Best for long hair. Holds well all day. About 10 minutes.
This boho upgrade stabilizes the bun and keeps the look intentional. I braid small sections on each side, bring them into a low knot, and let the ends peek out. It’s a favorite when I want something pretty for a casual dinner. Technique tip: keep the braids loose so they blend into the messy texture. Over-braiding makes the style look too formal.
Messy bun with hidden looped ends
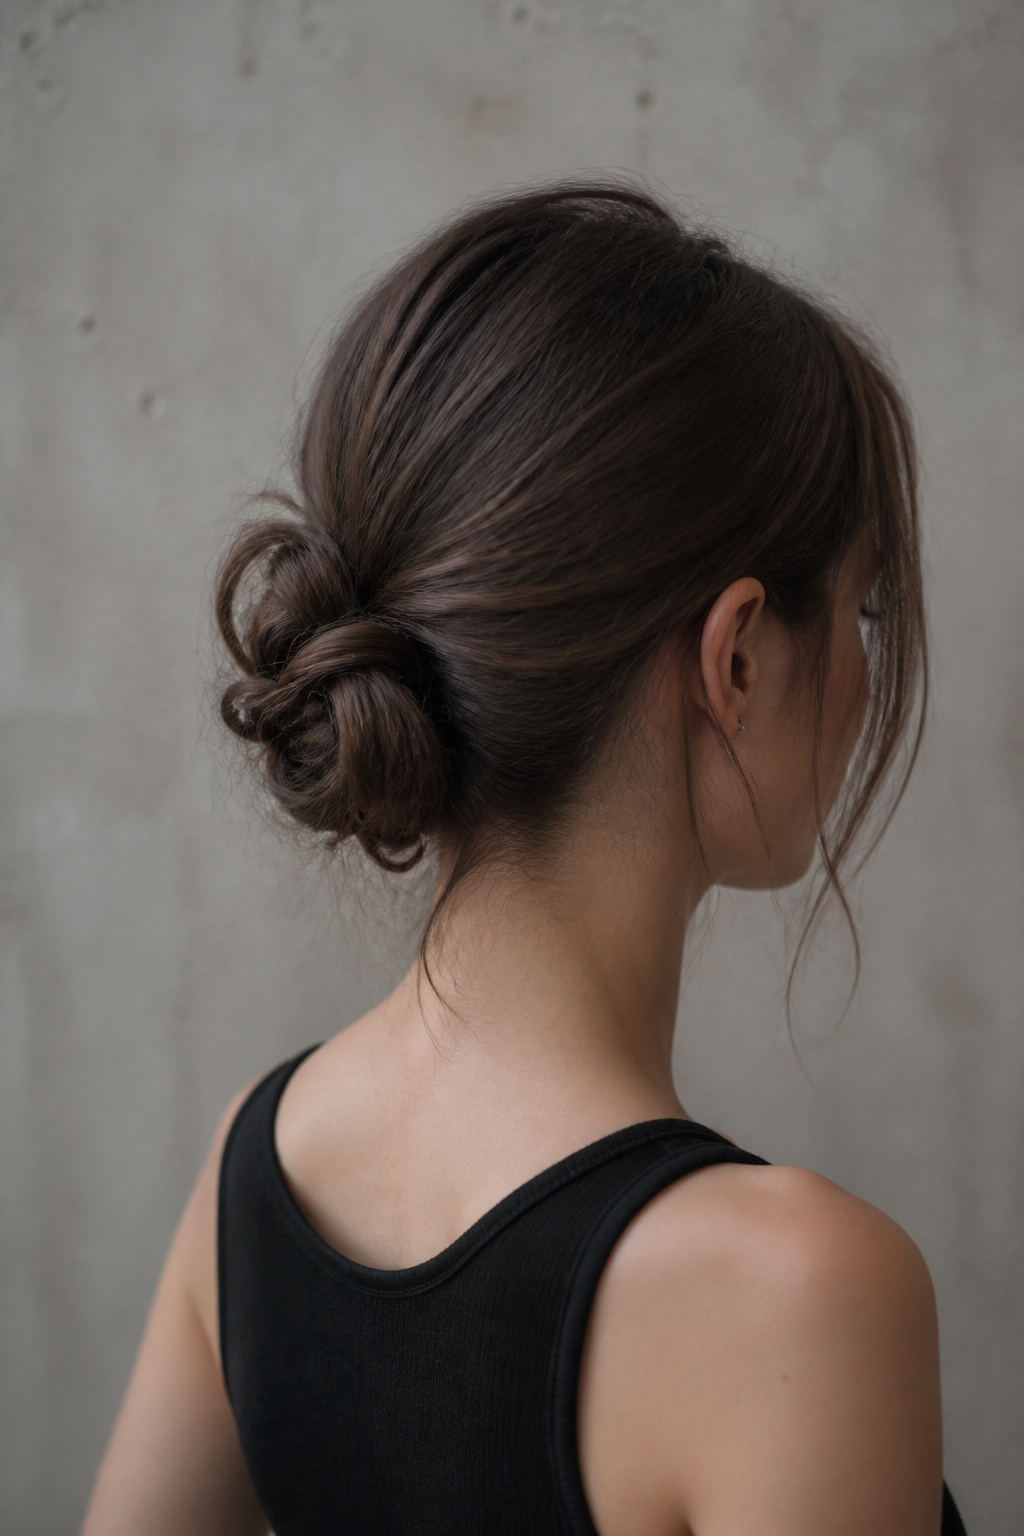

Best for fine to medium hair. Builds density visually. About 6 minutes.
Looping and tucking the ends gives a controlled messy look that reads intentional. I pull hair through an elastic one and a half turns, then tuck remaining lengths under and pin, creating a fuller silhouette without backcombing. This solves the “messy looks lazy” problem. Mistake to avoid: leaving uneven ends poking out—pin them neatly into the loop for a polished finish.
Donut-shaped messy bun for fine hair
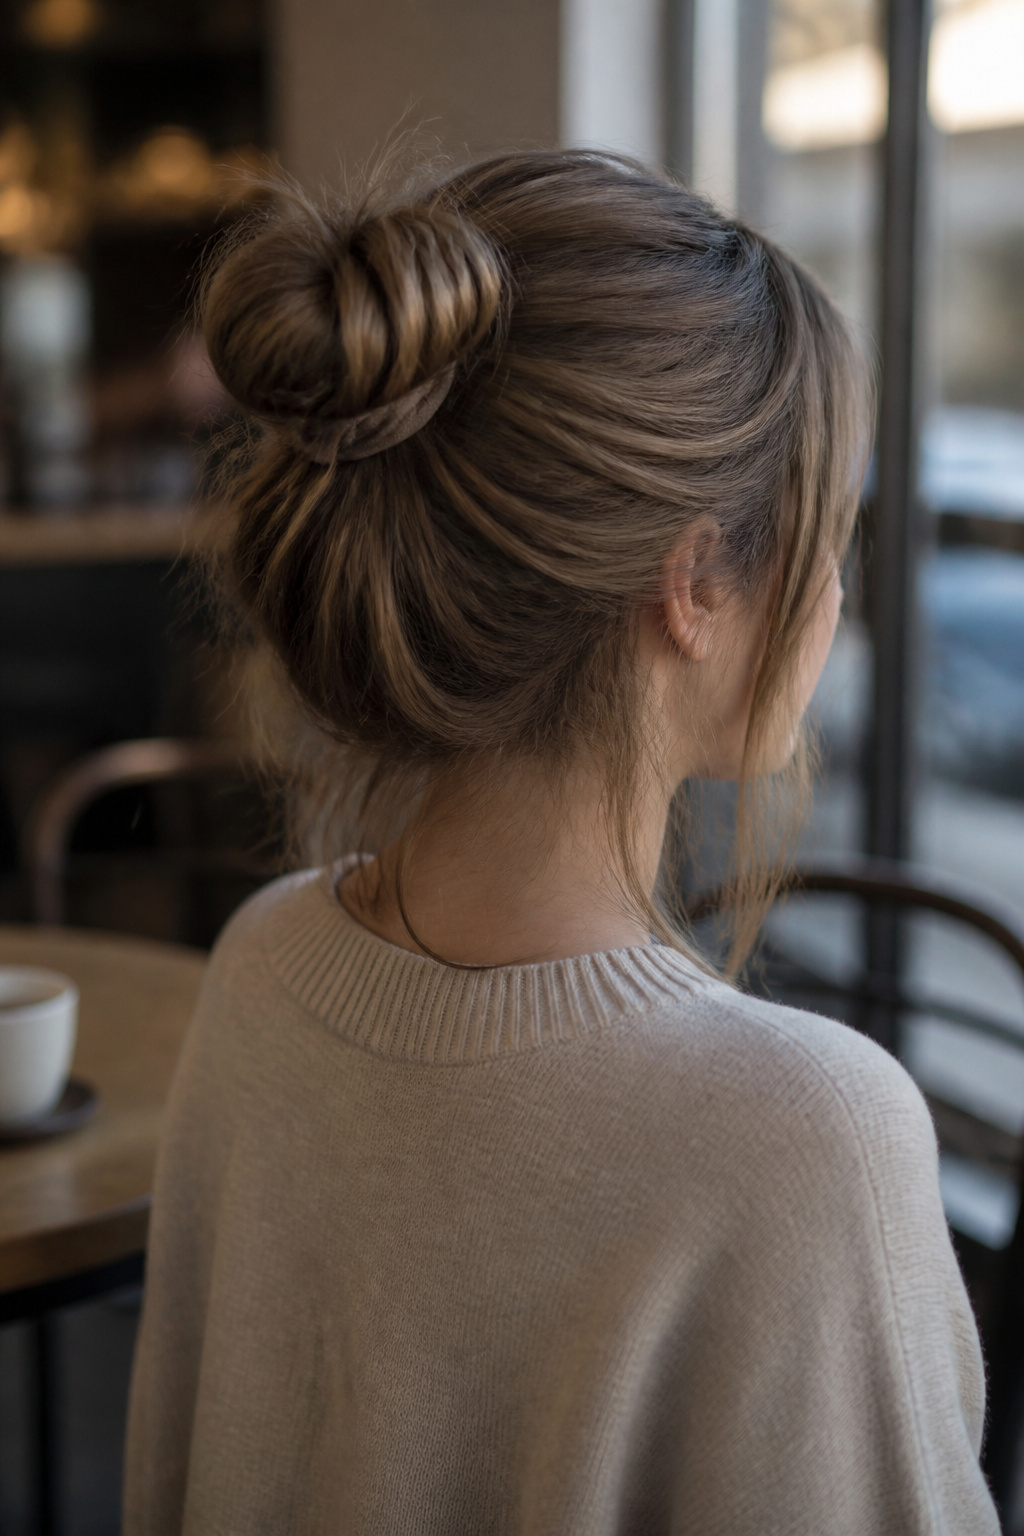

Best for fine hair. Use a foam donut for structure. About 5 minutes.
If your bun looks tiny, a donut or scrunchie base adds instant volume. I thread the pony through the donut, wrap hair around it, and pull small loops for texture. This builds shape without heavy teasing. Honesty: the first time I tried a giant scrunchie I looked like I had a pillow on my head; size matters. Pick a donut that matches your hair length.
Curly messy bun with loose coil definition
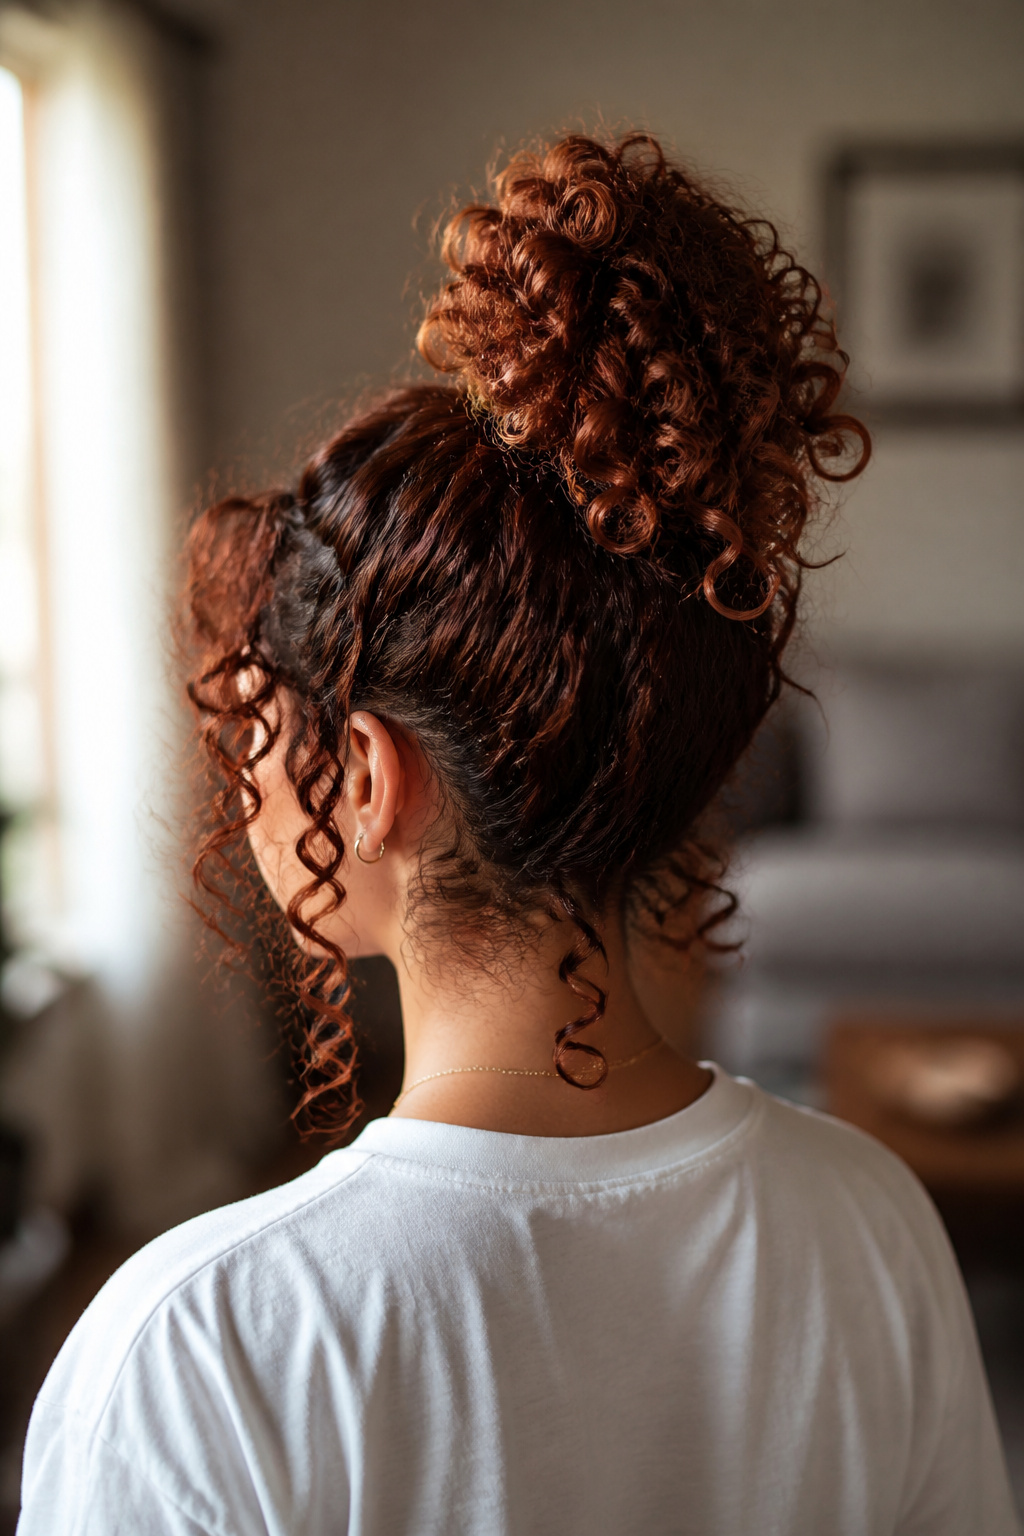

Best for curly and coily hair. Preserve curl pattern. About 8 minutes.
This keeps curl texture visible and avoids the brushed-out frizz that ruins a messy bun for many curls. I gather hair loosely, secure at the crown, then leave defined coils around the edges rather than flattening them. Use a curl cream before styling and finger-shape the perimeter. Common mistake: over-brushing; it destroys curl definition and adds frizz.
Messy bun with soft face-framing layers
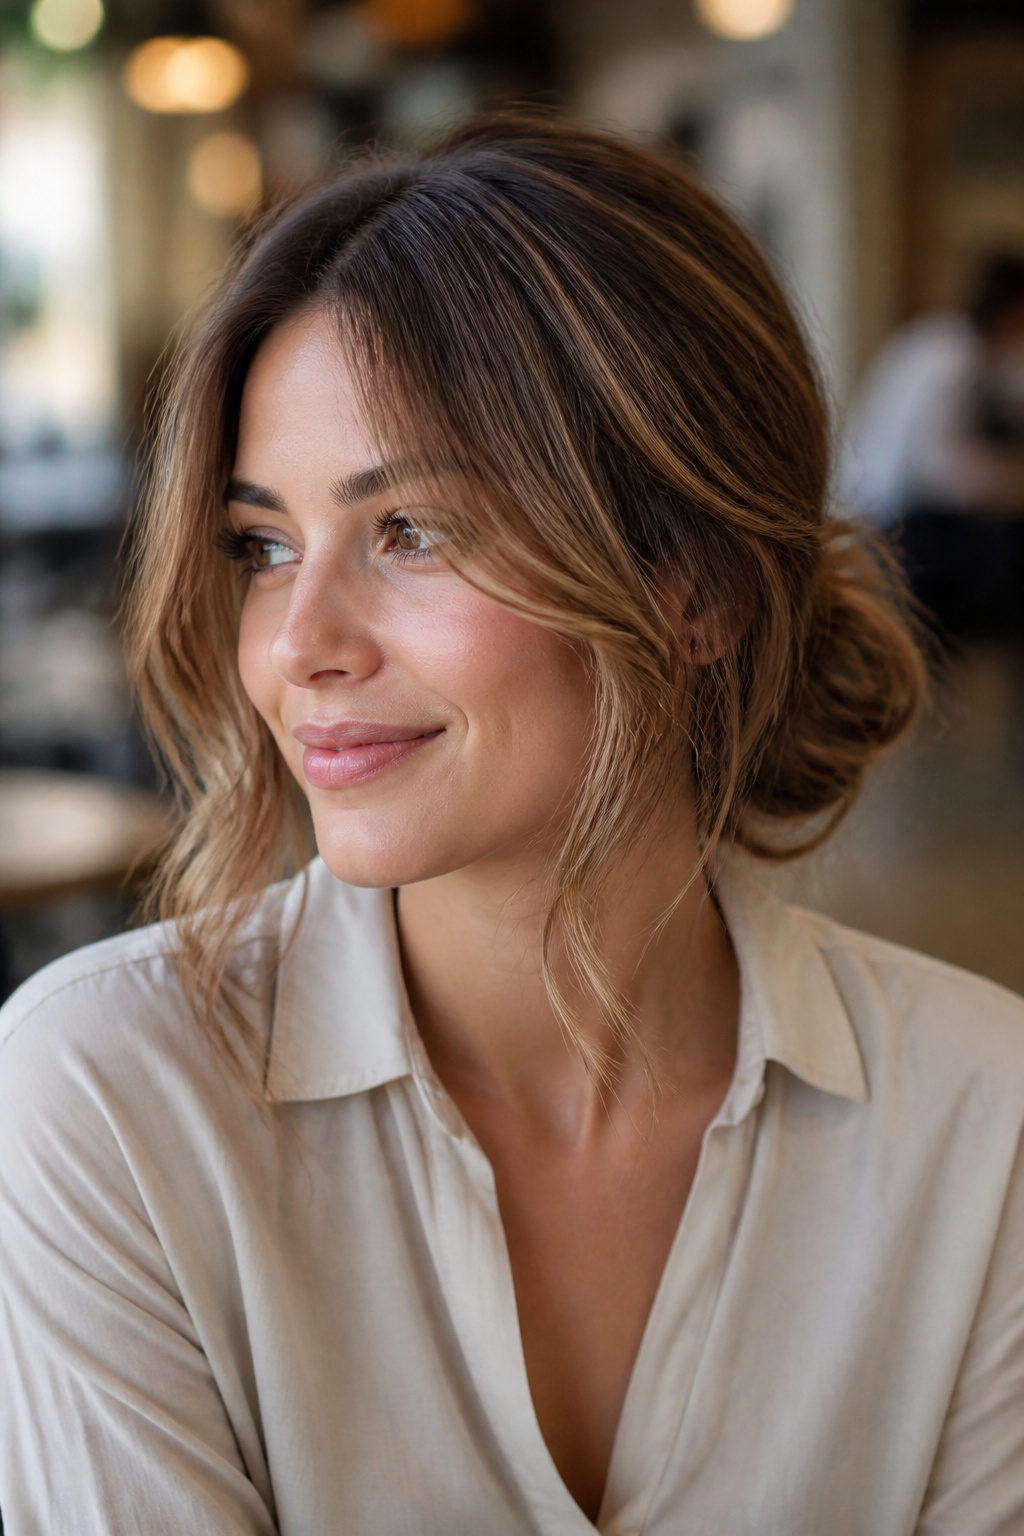

Best for medium hair with layers. Trim layers every 10 weeks. About 6 minutes.
Face-framing layers are the easiest way to stop a bun from reading severe. I pull the bun low and let the layers fall and curl slightly with a 1.25-inch wand so they sit softly. Technique: curl away from the face only on the mid-lengths; avoid curling the roots. Nobody tells you this: too-short layers can stick up, so ask your stylist to leave long face-framing pieces.
Woven low bun with braid detail
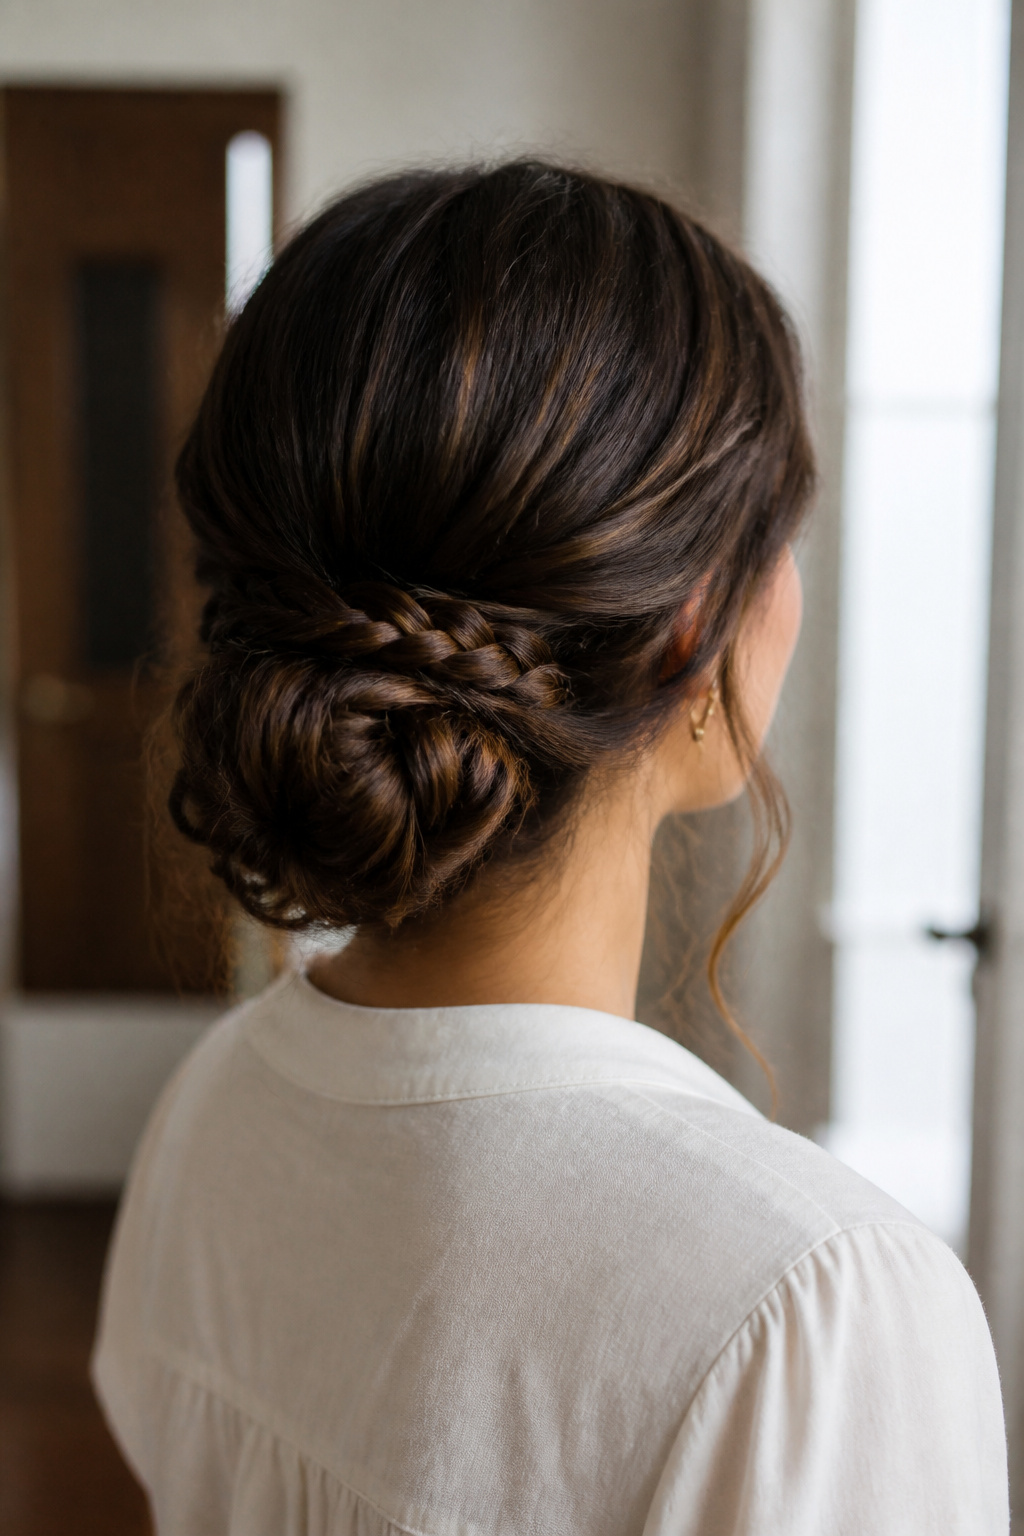

Best for long hair. Secure for events. About 12 minutes.
If you want a simple updo that reads more finished, wrap a slim braid around a low knot. It anchors the bun and makes it last through meetings or dinners. I braid two 1-inch sections from each side, bring them around, and tuck into a messy knot. Overcomplicating the braid size makes it look staged; keep it small and relaxed.
Pinched-and-pulled big bun
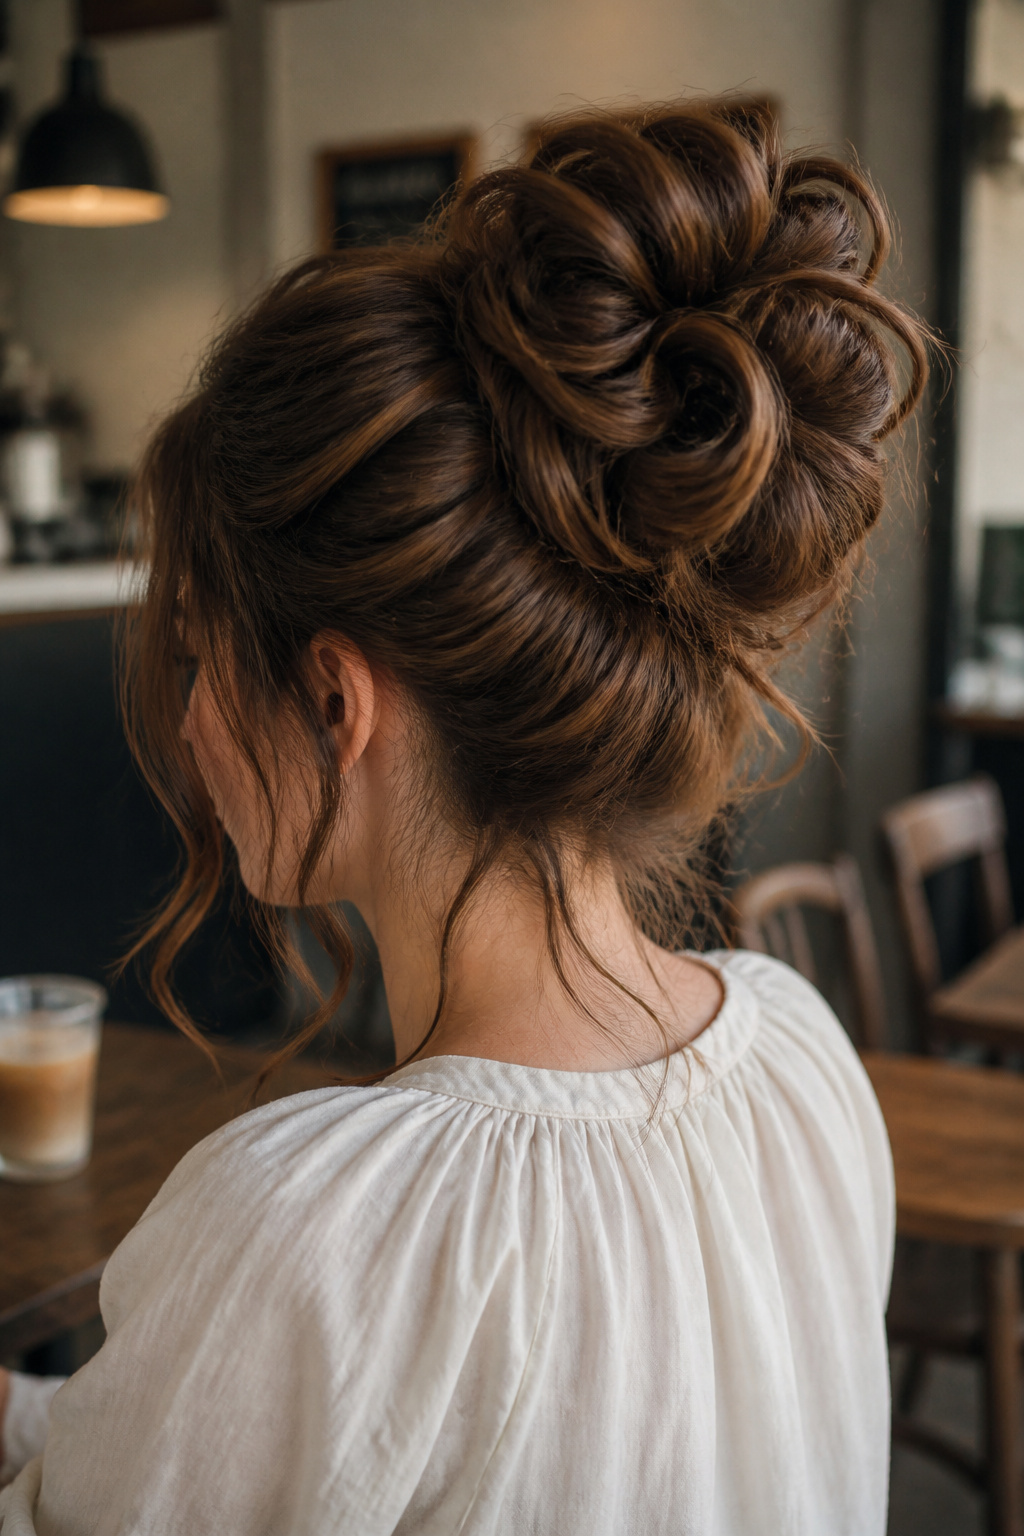

Best for medium to thick hair. Refresh by pinching. About 7 minutes.
This is all about volume created after the bun is secured. I pin the base tightly, then pinch sections outwards to blow up the shape. It looks modern and airy rather than spherical. The technique makes huge hair without heavy teasing. Overrated trend warning: endless backcombing can damage hair; use pinching instead.
Messy bun with scarf or ribbon accent
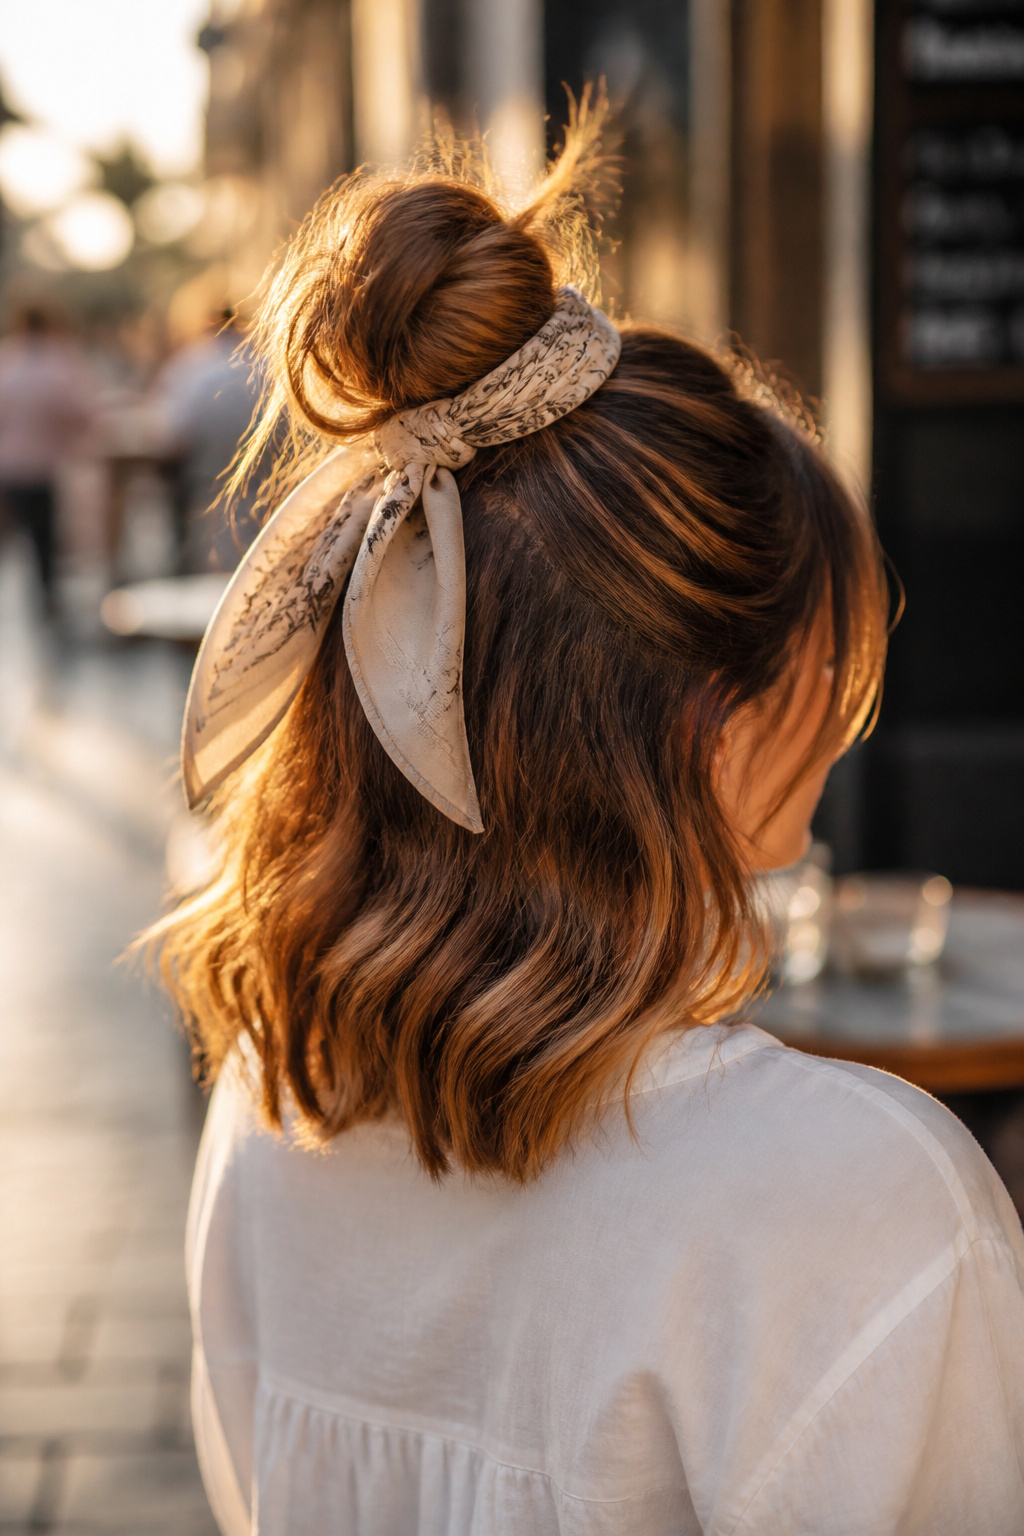

Best for medium to long hair. Scarf hides looseness. About 5 minutes.
Adding a scarf instantly lifts a basic bun into a styled look. I tie a narrow silk scarf around the base and let the tails hang or tuck them in. It hides slackening during the day and gives a retro-boho feel. Tip: pick a lightweight fabric so it does not weigh the bun down.
Messy bun for bob and short-length hair
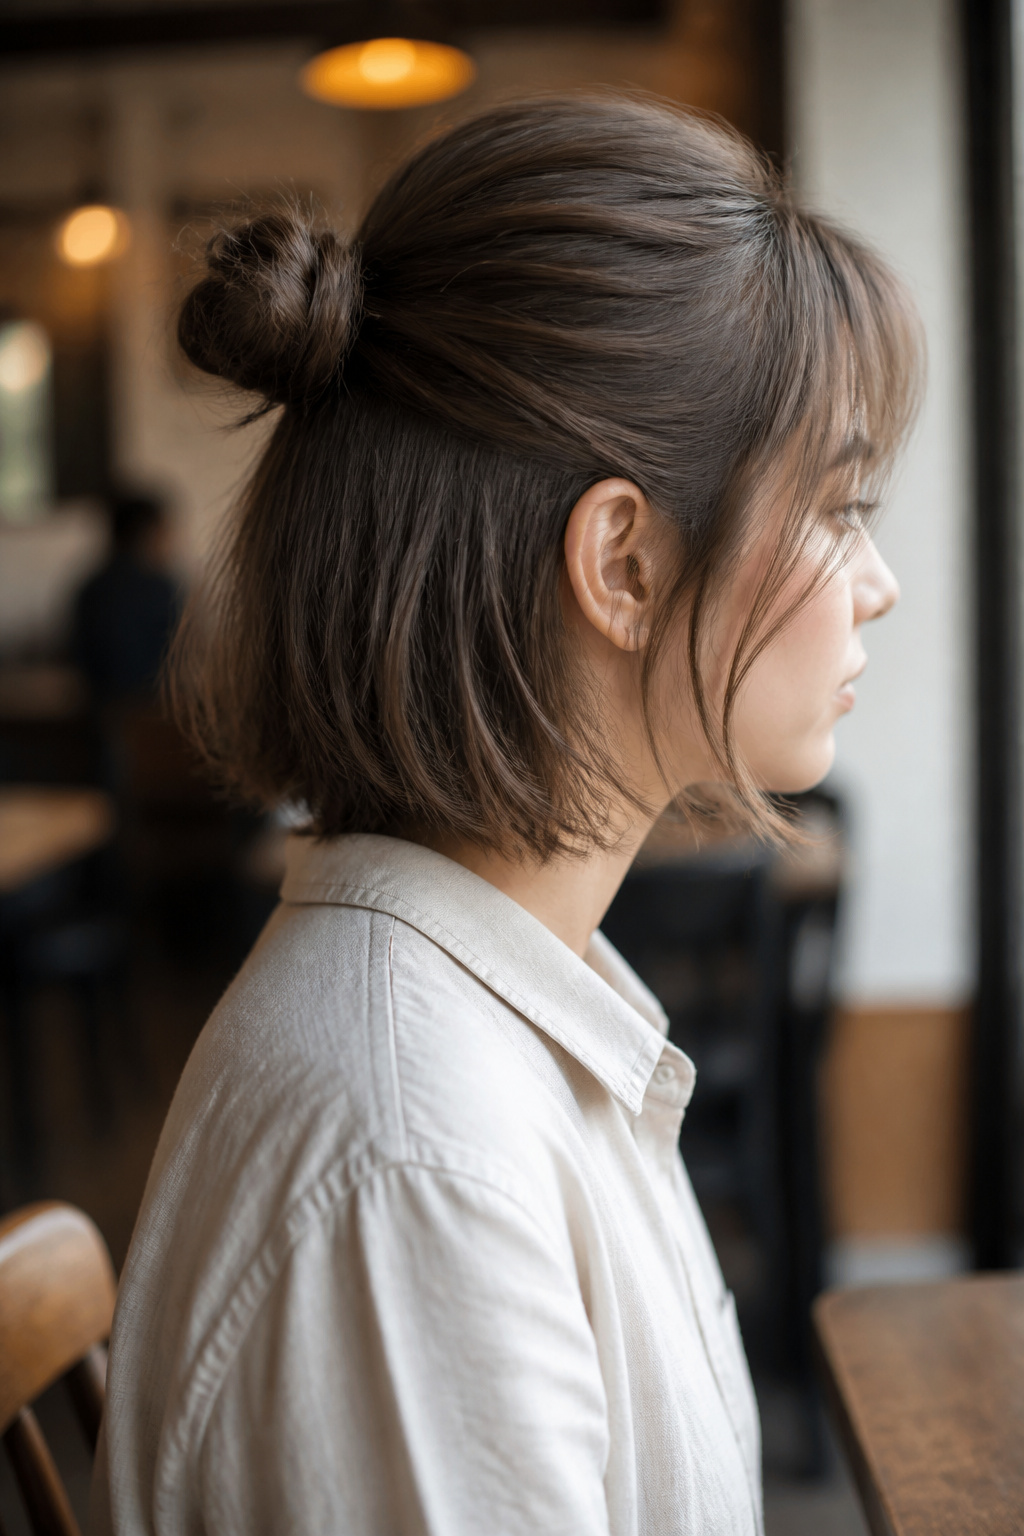

Best for chin-length bobs. Use pins for hold. About 5 minutes.
Short hair can make a charming, compact messy bun when you gather what you can and secure it with pins. I tease the crown slightly, use a little texturizing spray for grip, and pin small sections into a tiny knot. Real talk: you won’t get a big ballerina bun, but the textured mini bun looks intentional and modern.
Textured bun with crisscross wrapping for hold
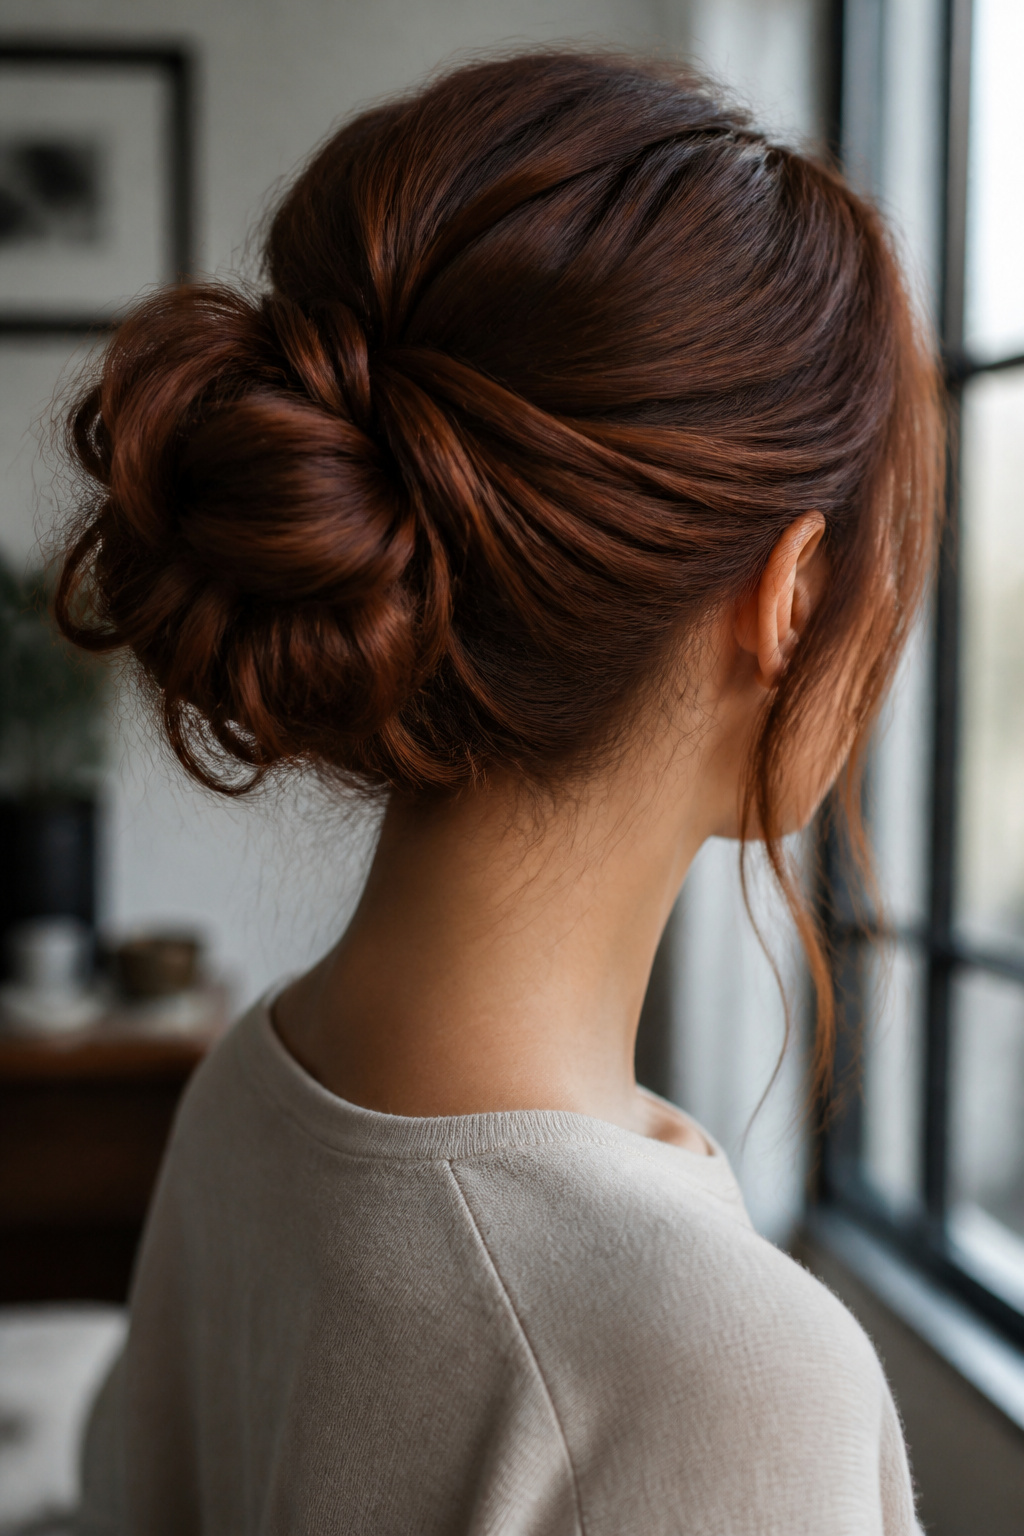

Best for long hair and second-day styles. Stays secure. About 8 minutes.
Crisscross wrapping stabilizes the bun without pins everywhere. I split the pony into two sections, wrap them opposite directions around the base, then loosely tuck ends. It looks textured rather than sloppy and survives a commute. Mistake: wrapping too tight removes the messy silhouette; keep it loose.
Soft bubble bun as an easy variation
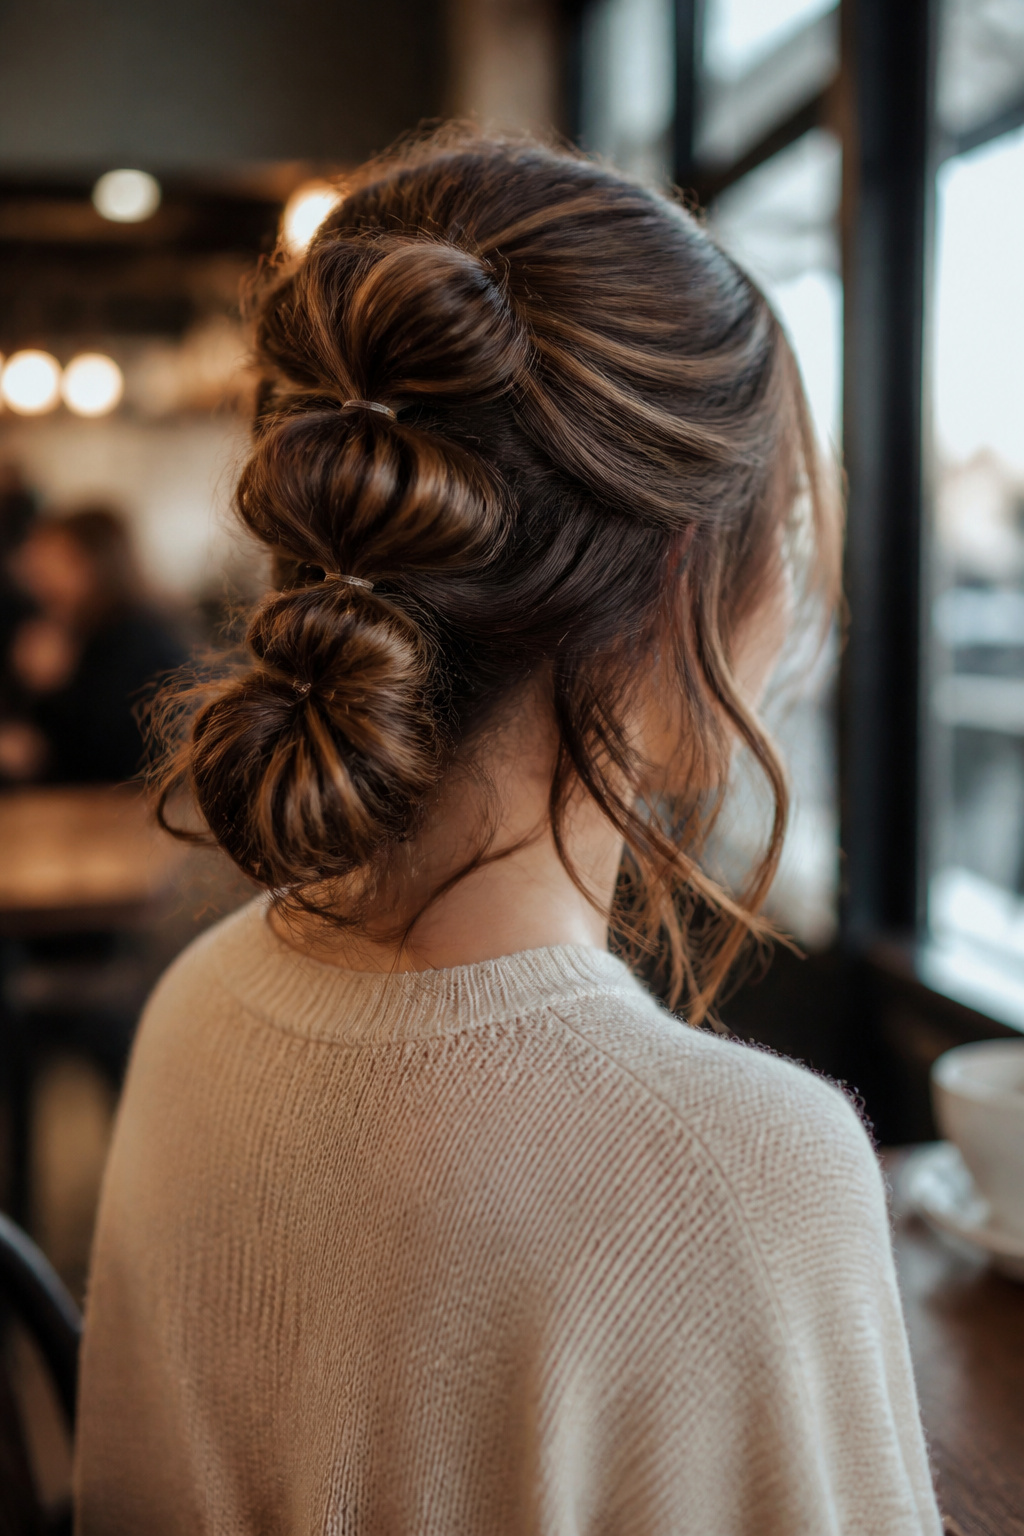

Best for medium hair. Fun for casual days. About 6 minutes.
A bubble formation before you pin creates playful volume and texture. I secure a pony, add a couple of ties down the length to make soft bubbles, then wrap the ends into a small messy knot. It’s quick and keeps the look fresh all day. Overuse of elastics can leave dents; choose soft bands.
What You'll Need to Get This Look
Heat Tools
- 1.25-inch ceramic curling wand ($30 to $60), for soft face-framing bends.
- 1-inch titanium curling iron ($25 to $50), for tighter coil definition on curls.
- Teasing comb with tail ($8 to $20), for minimal root lift.
Styling Products
- Texturizing spray, 6oz ($10 to $20), great for second-day grip.
- Lightweight dry shampoo, 4oz ($8 to $18), avoid white residue.
- Sea salt spray, 5oz ($7 to $15), for undone texture.
Hair Care and Protection
- Heat protectant spray, 6oz ($10 to $25).
Accessories and Finishing
- Strong hold bobby pins, pack of 100 ($5 to $12).
- Foam donut bun maker, medium ($4 to $12).
- Silk scarf, 22 by 22 inches ($10 to $30).
Budget Swaps
- Elastic hair ties, pack of 20 ($5 to $12), drugstore alternative to higher-priced bands.
- Generic texturizing powder, 0.3oz ($6 to $12), for extra grip when you need it.
Shopping Tips for These Looks
Buy tools during holiday sales: Curling wands and irons drop 20 to 30 percent in November. I waited and grabbed my 1.25-inch ceramic curling wand.
Choose matte finish texturizers: They add grit without shine. Pick a texturizing spray, 6oz if you want a lived-in look.
Scrunchies are worth the slot in your drawer: A medium foam donut or a large scrunchie like the foam donut bun maker, medium makes fine hair look fuller.
Stock up on bobby pins in two shades: Keep black and bronze on hand for blends. My go-to is the strong hold bobby pins, pack of 100.
Frequently Asked Questions
How do I make a messy bun hold on freshly washed hair?
Style on second-day hair when possible, or add a light dusting of a lightweight dry shampoo, 4oz at the roots for grip. Freshly washed hair is too slippery.
What works best for fine hair to get volume?
Use a donut or a scrunchie base and texture spray. The foam donut bun maker, medium is cheap and instantly helps.
Can curly hair keep definition in a messy bun?
Yes. Use a curl cream before styling, gather loosely, and leave a ring of curls out. Avoid brushing the curls flat.
Any tips for short bobs that won’t reach a bun?
Pin small sections into a textured knot and use strong pins to anchor pieces. A tiny pulled knot reads intentional rather than incomplete.
Final Thoughts
Start with the high messy bun with face-framing tendrils if you want immediate returns; it’s forgiving and fast. Try the donut hack if your hair is fine, and experiment with a scarf for an instant upgrade. Which of these will you try tomorrow morning?


