






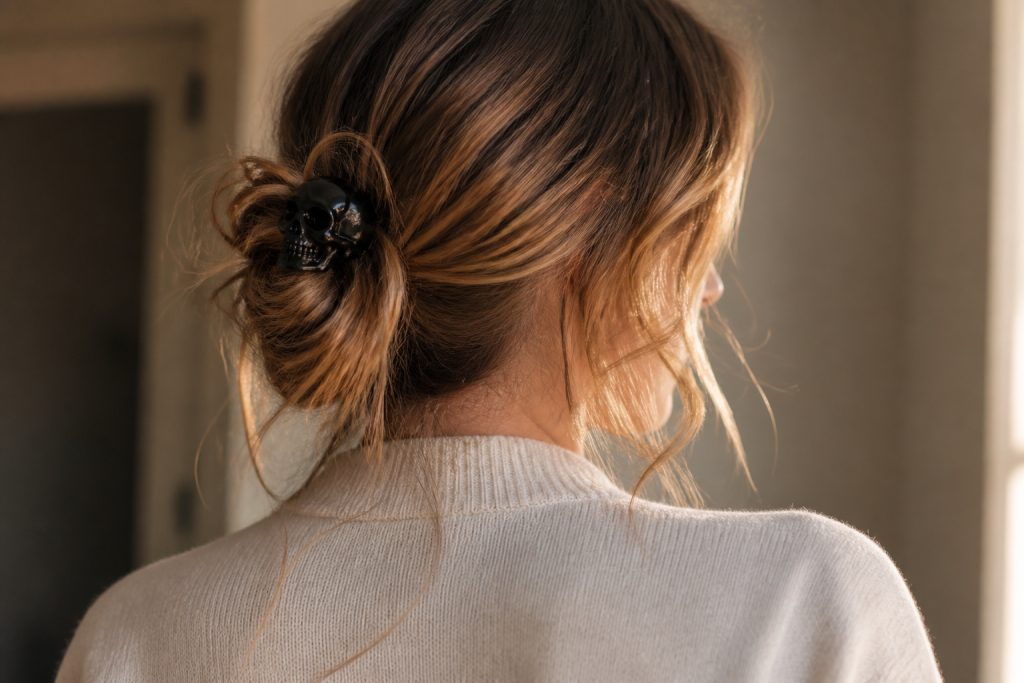

I remember pulling a drawer of costume clips the night before a party and realizing halloween hair clips could make a sleepy messy bun look like I thought it through. This list brings 15 ways to tuck, twist, and pin a messy bun so it reads styled rather than rushed. These ideas suit fine to thick hair, short bobs to long layers, and most take under 10 minutes.
These looks skew slightly undone and textural. Short on fuss, heavy on detail. Expect styles that work on day two hair, a few that need fresh wash texture, and quick tricks my stylist only told me after I asked the hard questions.
15 Halloween Hair Clips That Make a Messy Bun Look Planned
Spider Clip at the Nape for Creepy-Polished Contrast
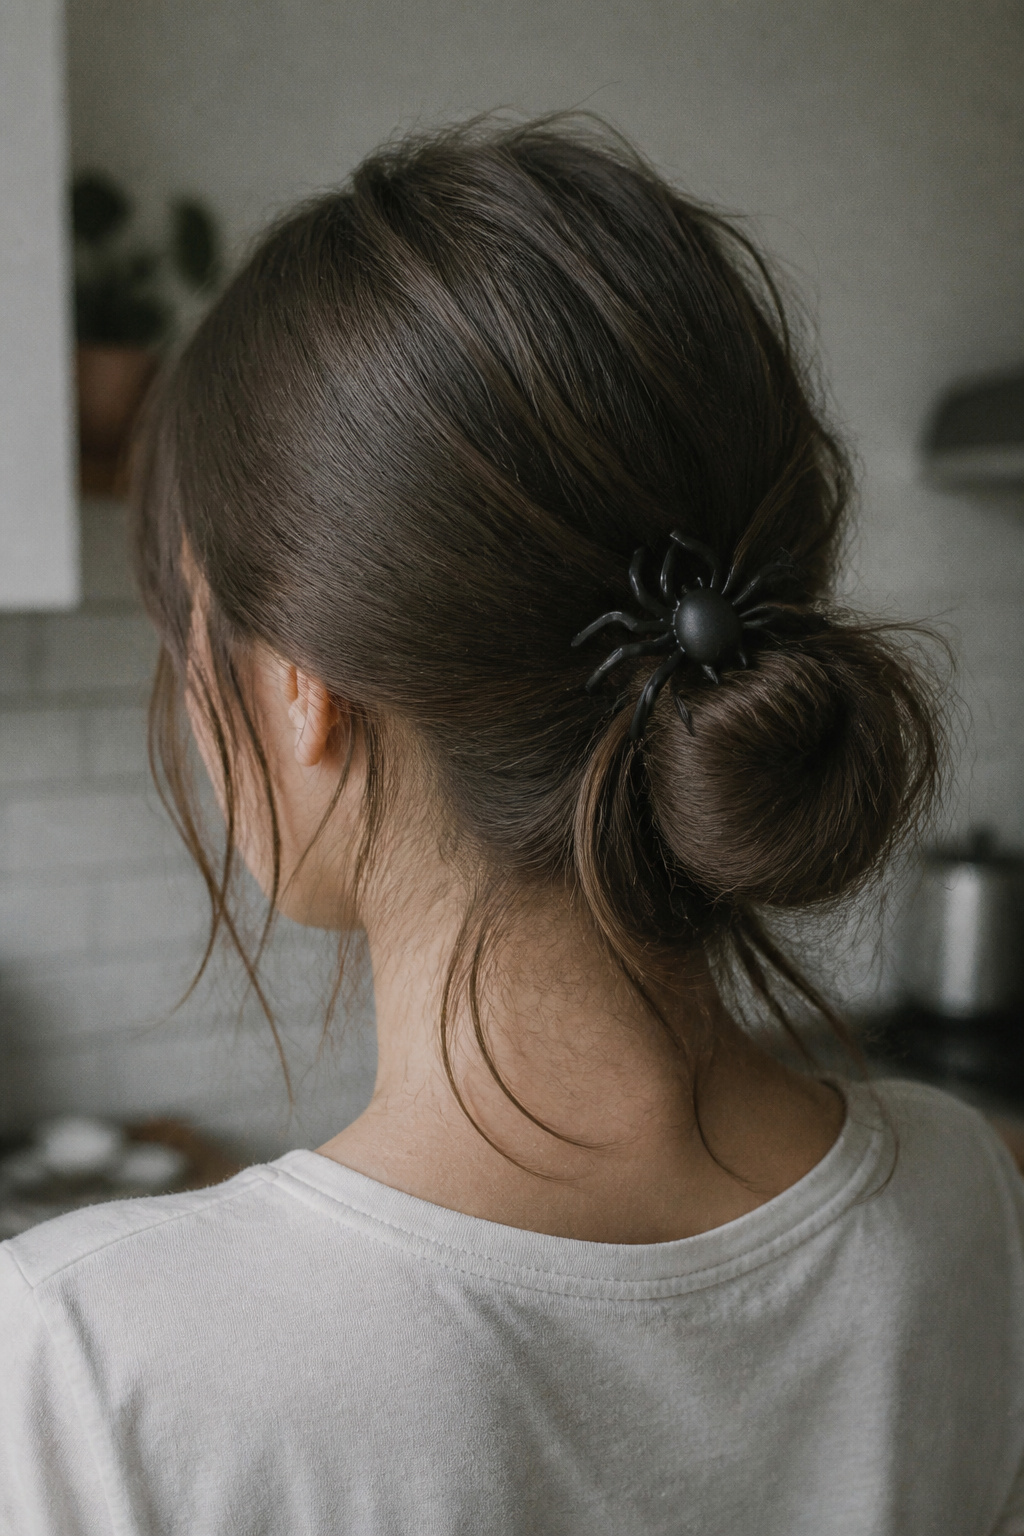

Best for medium to thick hair. Survives day two with touchups. About 5 minutes to pin and reposition.
A single spider clip instantly makes a low messy bun look intentional. The visual payoff is the contrast between the organic bun shape and the deliberate metal pin. This flatters oval and heart faces because the clip draws the eye down and lengthens the neck.
The trick is to anchor the clip in the hair tie and weave a small top layer of hair over it. Most people shove the clip into the very end of the bun and it falls out. Use a small anchoring bobby pin first, then slip the spider clip on top. Try a skull and spider clip set if you want matching pieces.
Bat Claw Cluster for Playful Volume
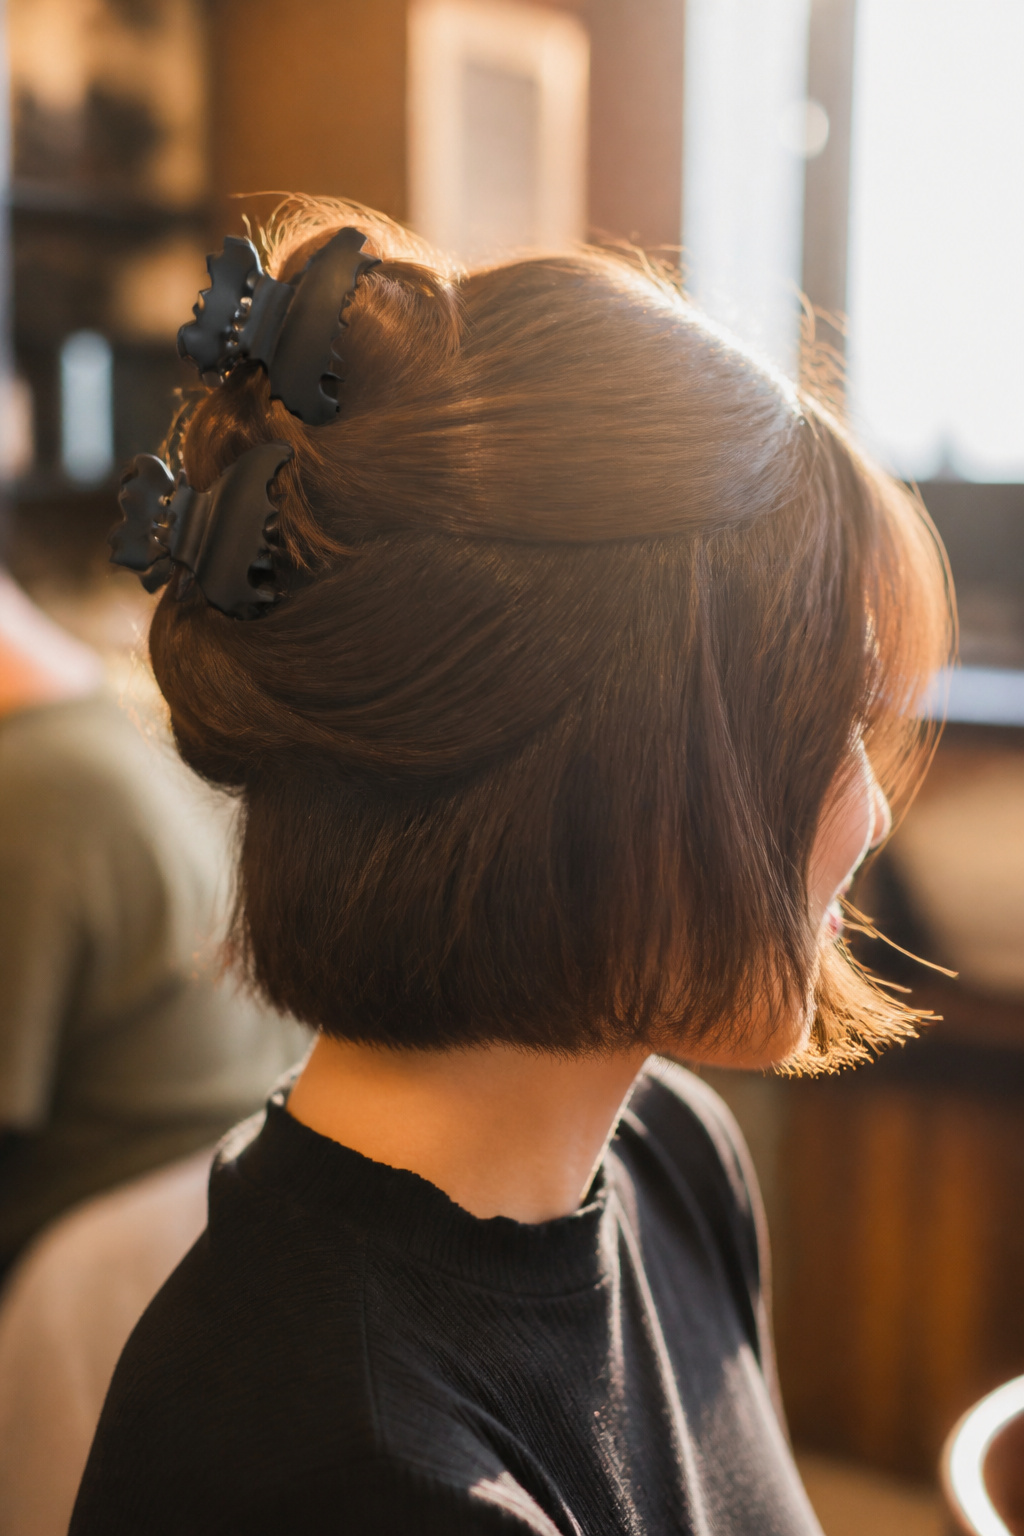

Best for short to shoulder-length hair. Works great on second-day hair. About 3 minutes.
Putting two or three small bat clips around a half-up messy bun thickens the silhouette. For fine hair, place clips with the teeth facing upward to trap hair. I learned this after one night when two clips slipped out because I set them flat.
Curl the ends first with a 1.25-inch ceramic curling wand so the bits that frame the face have movement. The bat cluster is not about symmetry. Let one clip sit higher for a lived-in effect.
Glazed Pearl Skull Pins for Subtle Spook
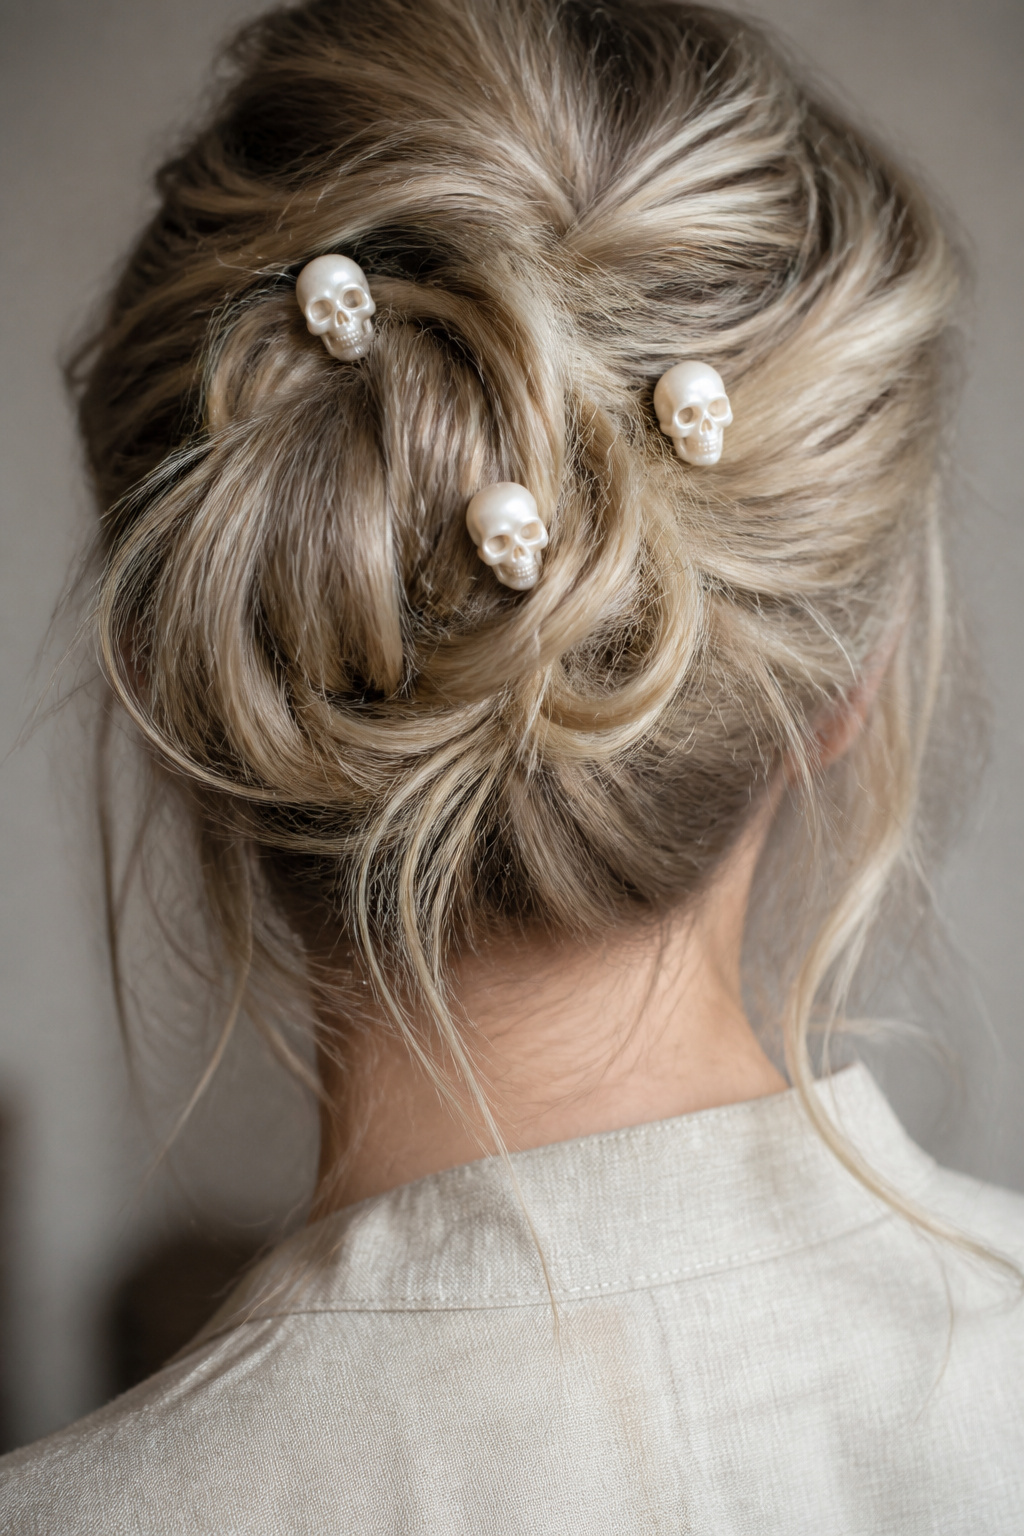

Best for fine to medium hair. Grows out gracefully. About 4 minutes to place pins.
Pearl skull pins make a messy bun look curated rather than costume. The pearls add polish, the skulls give the Halloween note. This flatters square and round faces because the vertical line of the bun with the little pins lengthens the profile.
Slide pins in at the bun’s perimeter so they catch the light. Avoid plunging them into the middle where they hide. I once layered too many and it read gaudy; three felt balanced on my long hair.
Twisted Halo Bun with Mini Pumpkin Pins
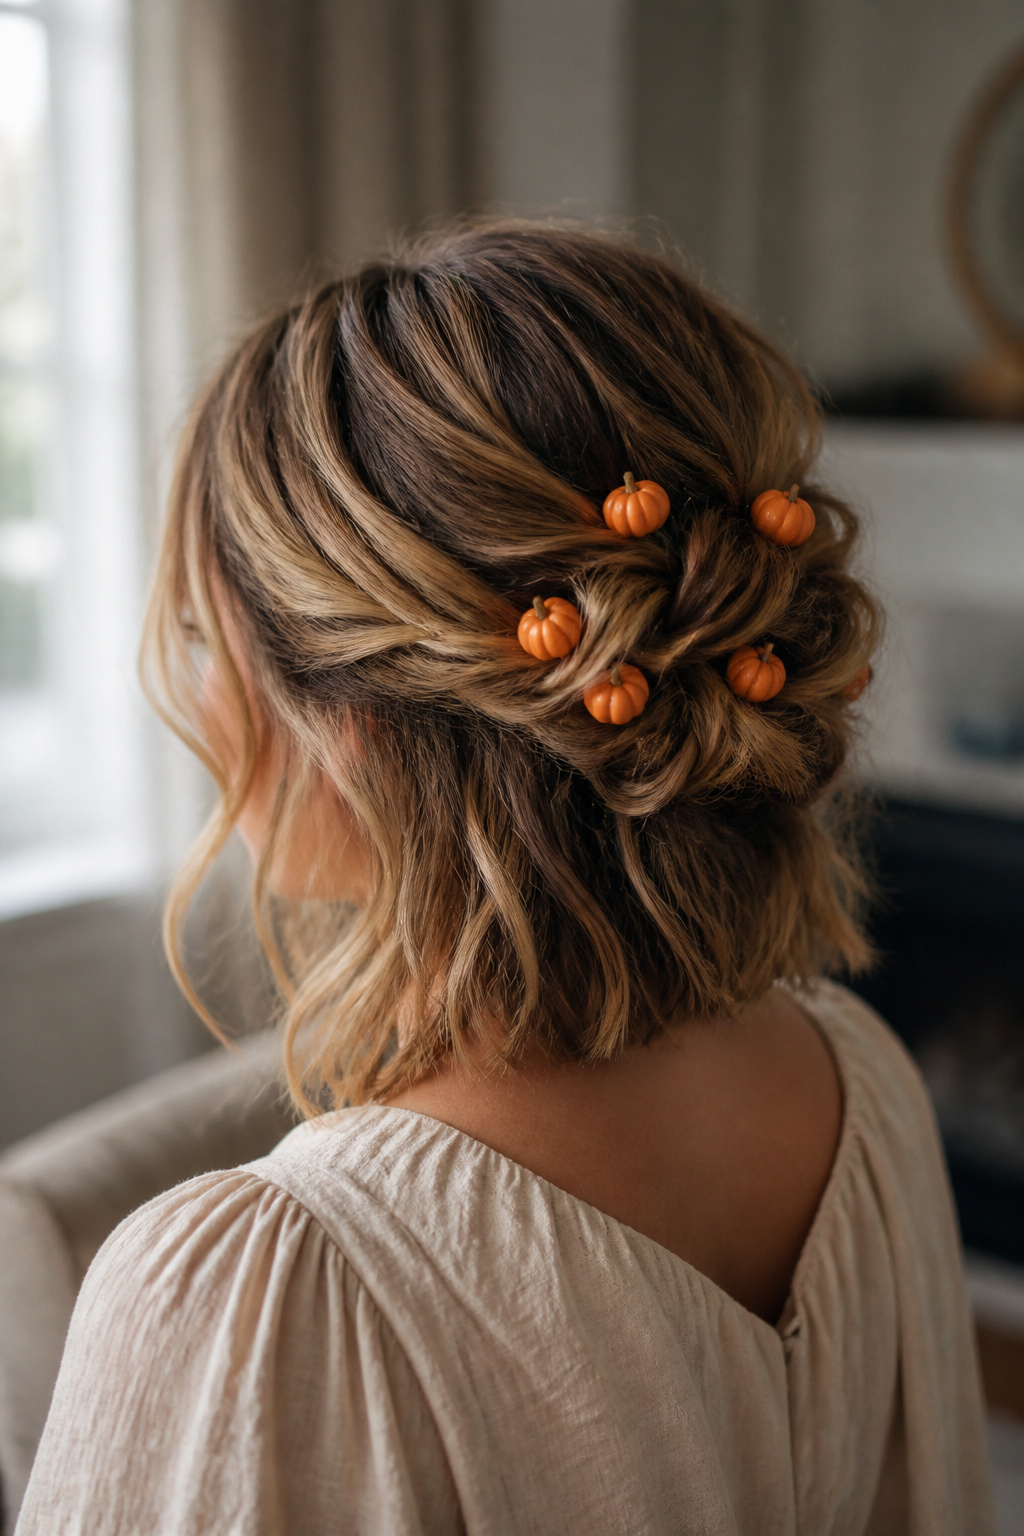

Best for medium hair. Trim layers every 12 weeks. About 8 minutes to twist and pin.
Wrap two twisted sections into a halo bun and tuck a few mini pumpkin pins along the twist. The technique gives the impression you planned the bun around the decorations, not the opposite. This works beautifully on shoulder-length hair because the twists hide the ends.
Most people overdo the pins. Scatter three to five and step back. If your hair is very fine, tease the root lightly before twisting so the pins bite.
Safety Pin Chain for Punk Edge
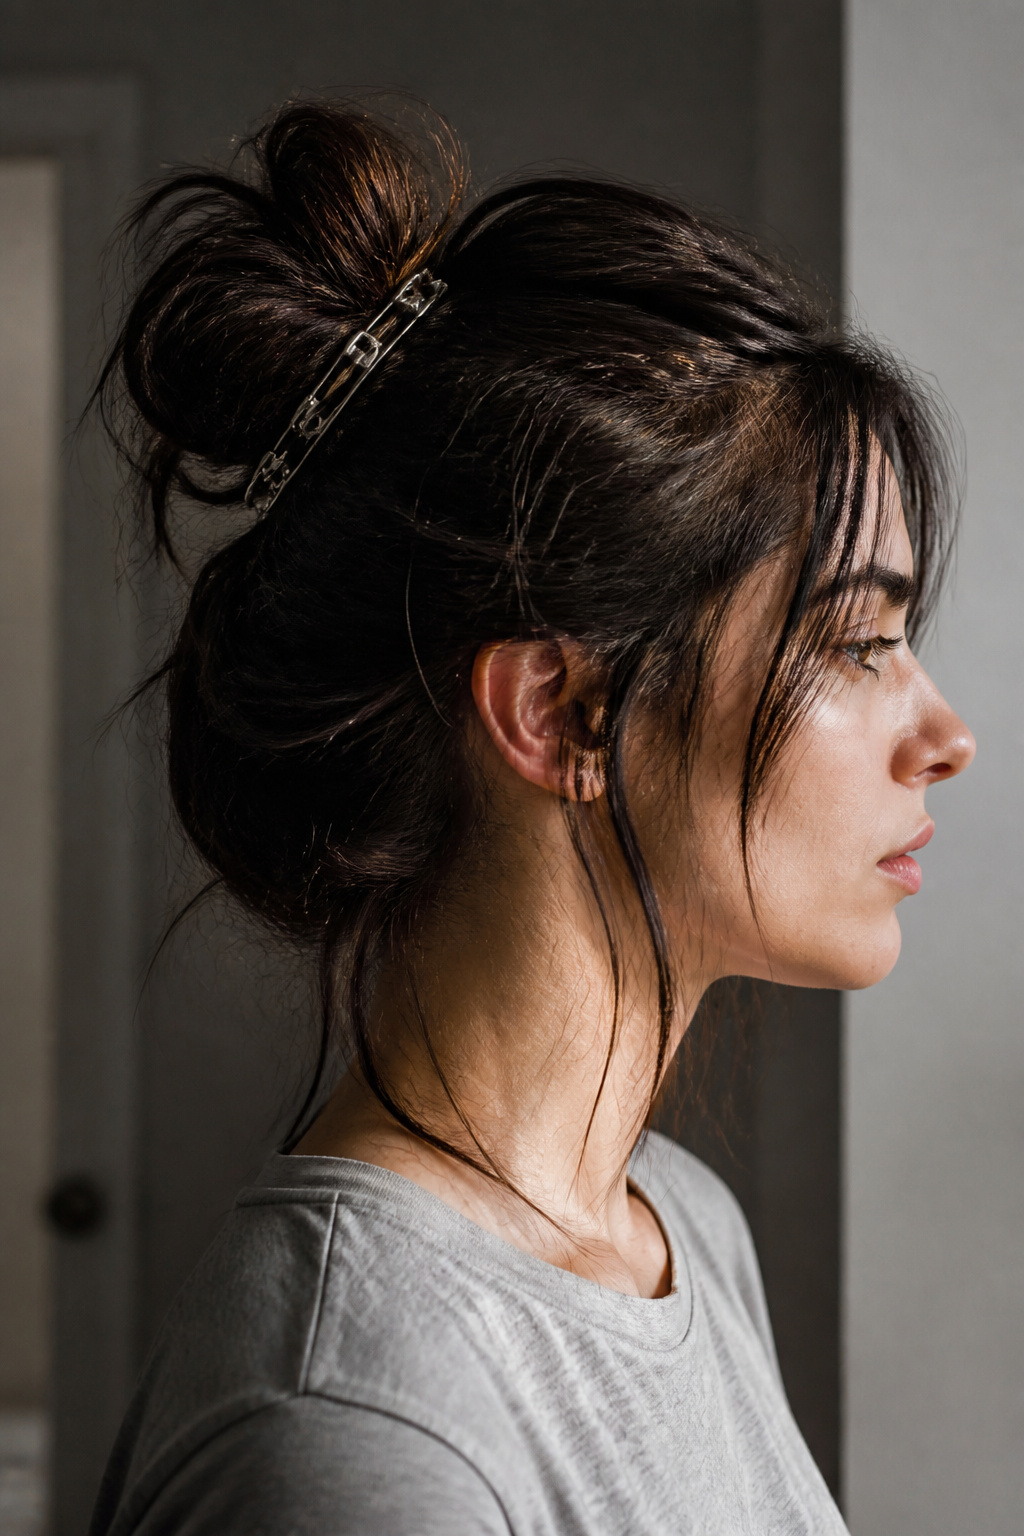

Best for thick hair. Holds through a night out. About 6 minutes to attach and secure.
I love the attitude a linked safety pin clip brings to an otherwise classic bun. Secure a few wide-set pins through the bun’s base and use small elastics to anchor the chain. This flatters angular faces and adds a modern, slightly punk silhouette.
Warning. If you have fragile hair, the metal edges can snag. Smooth the area with a touch of heat protectant serum before pinning.
Moon Crescent Barrette Cluster for Off-Kilter Shine
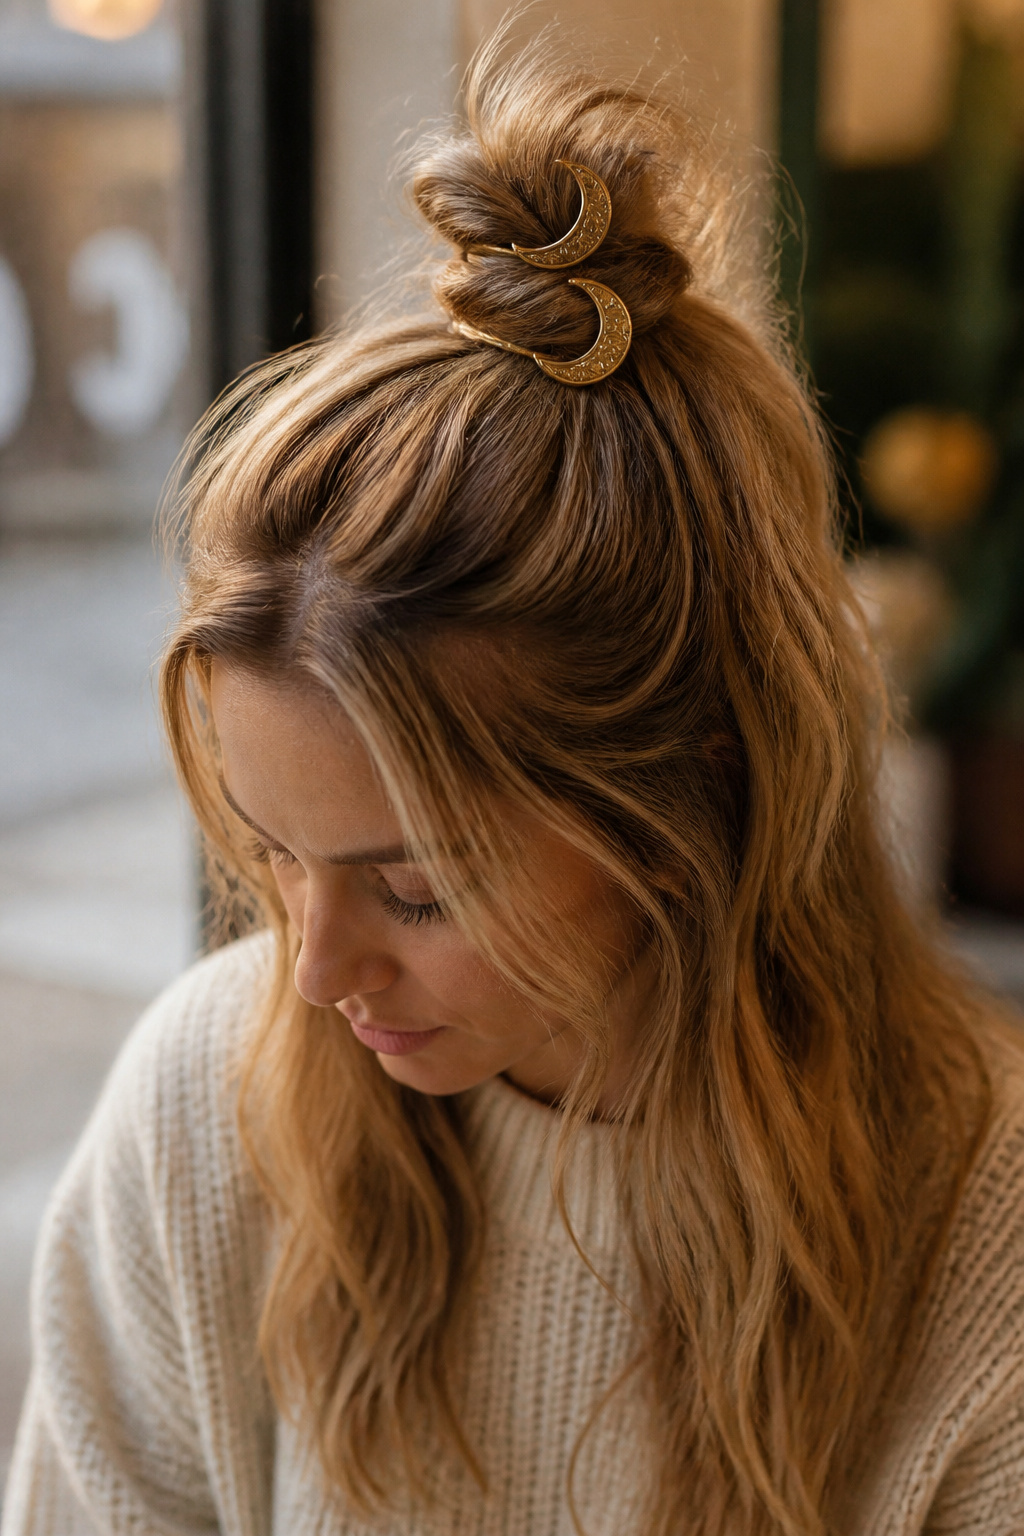

Best for medium to thick hair. Looks intentional on day one and two. About 4 minutes to clip.
A cluster of metallic crescent barrettes at the front of a messy bun feels like jewelry for hair. The payoff is the asymmetry; one barrette slightly askew reads modern. This flatters oblong faces by adding width at the forehead.
The mistake is aligning barrettes in a straight line. Let them overlap slightly. I paired this with a light mist of texturizing spray for grip.
Net Veil Clip for Soft Gothic Glam
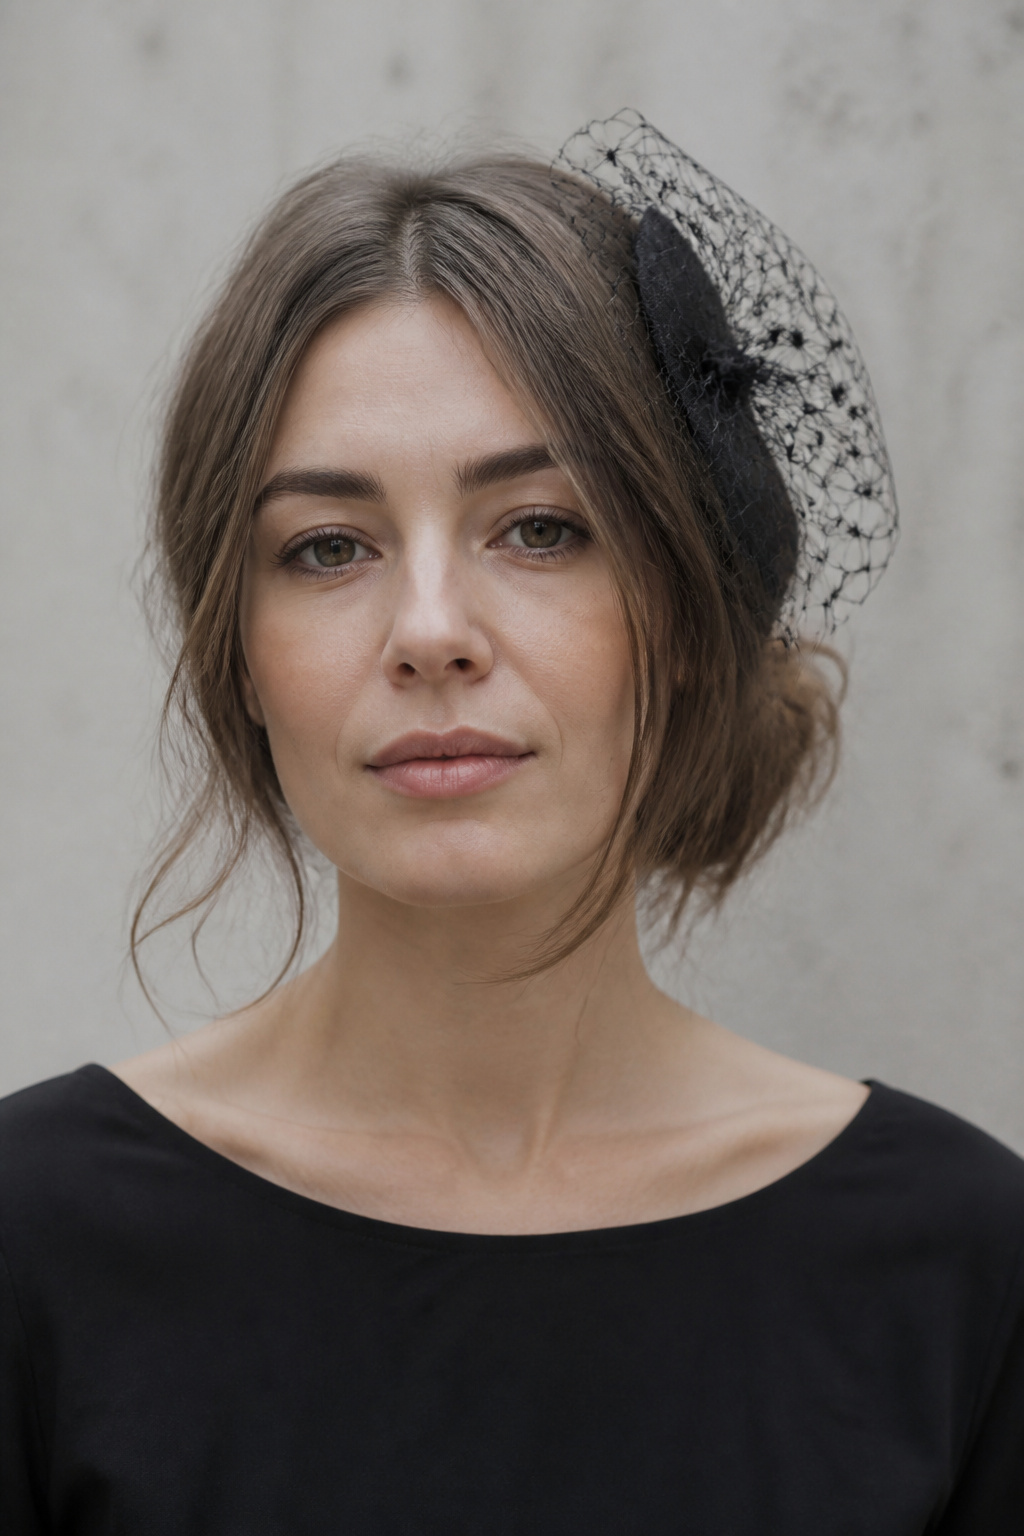

Best for shoulder-length hair. Trim bangs or layers often. About 6 minutes to position.
A tiny net veil clipped over a low messy chignon reads like a vintage nod with Halloween intent. It’s one of those looks that photographs beautifully because the veil softens the face. It flatters long faces by adding horizontal interest at the cheek level.
This is a moodier look. Quick tip: avoid large veil pieces that overwhelm small faces. My first attempt used too much net and it swallowed my features.
Batwing Bobby Pin Mosaic
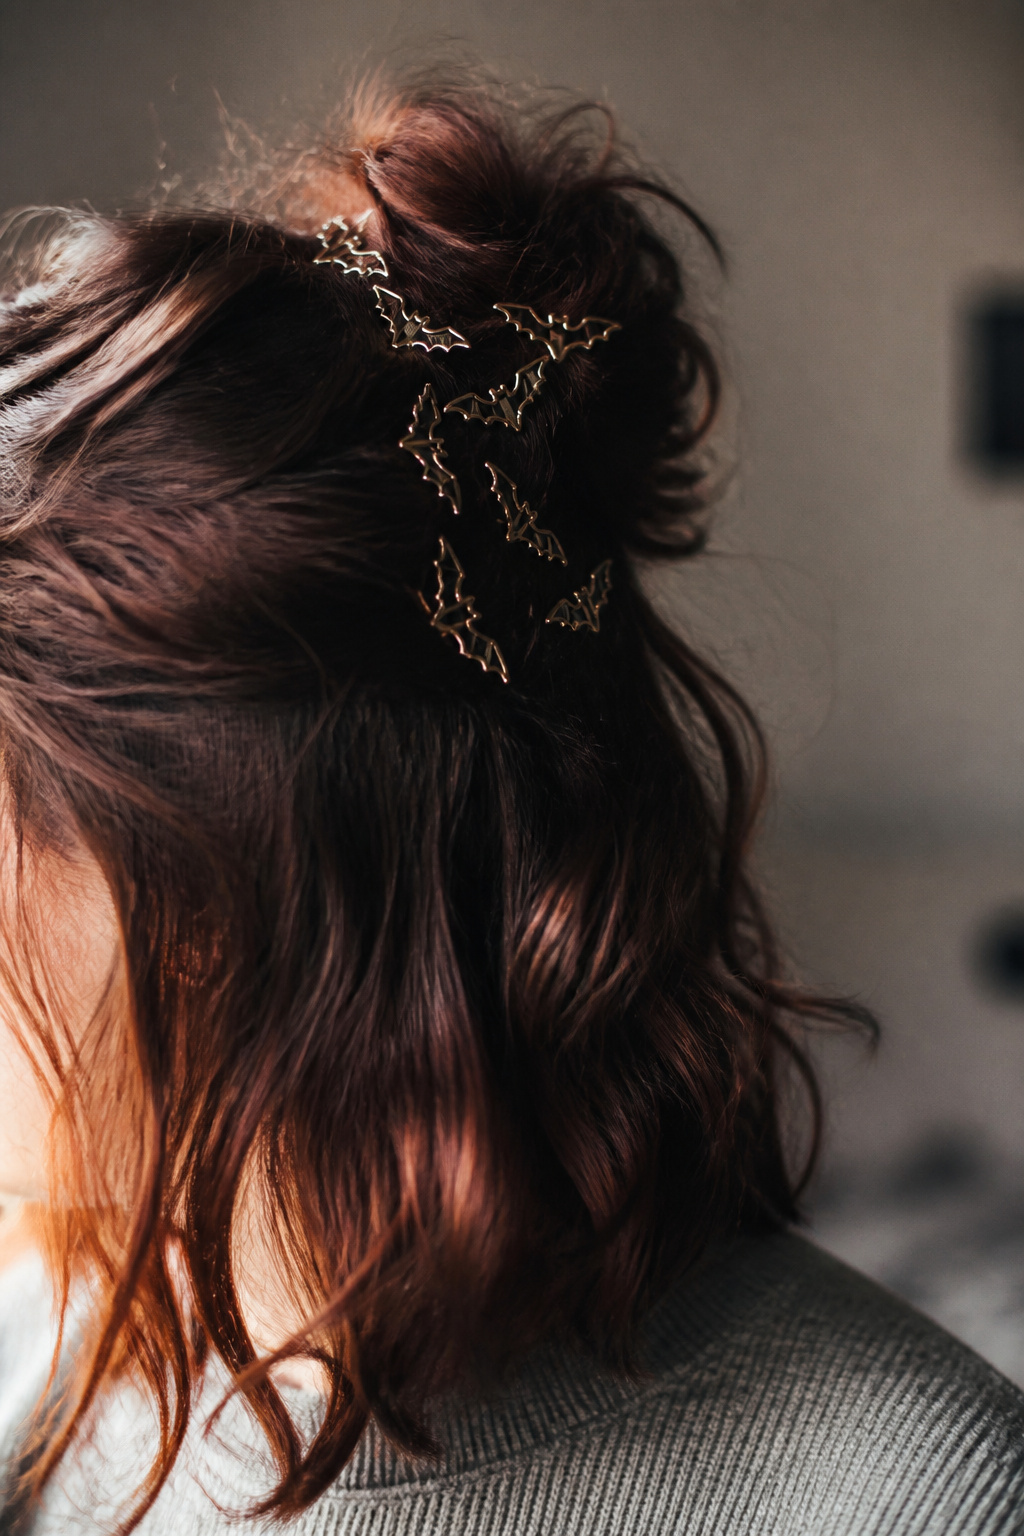

Best for fine to medium hair. Reconfigures easily. About 3 to 5 minutes to place pins.
Scatter themed bobby pins across the bun rim in a mosaic rather than a pattern. This look reads intentional and artisanal. It flatters high cheekbones because the cluster sits low and doesn’t compete with the face.
The common mistake is lining the pins in a straight bar. Stagger them for texture. I like mixing sizes and finishes for depth.
Jeweled Crescent Moon for Date Night Edge
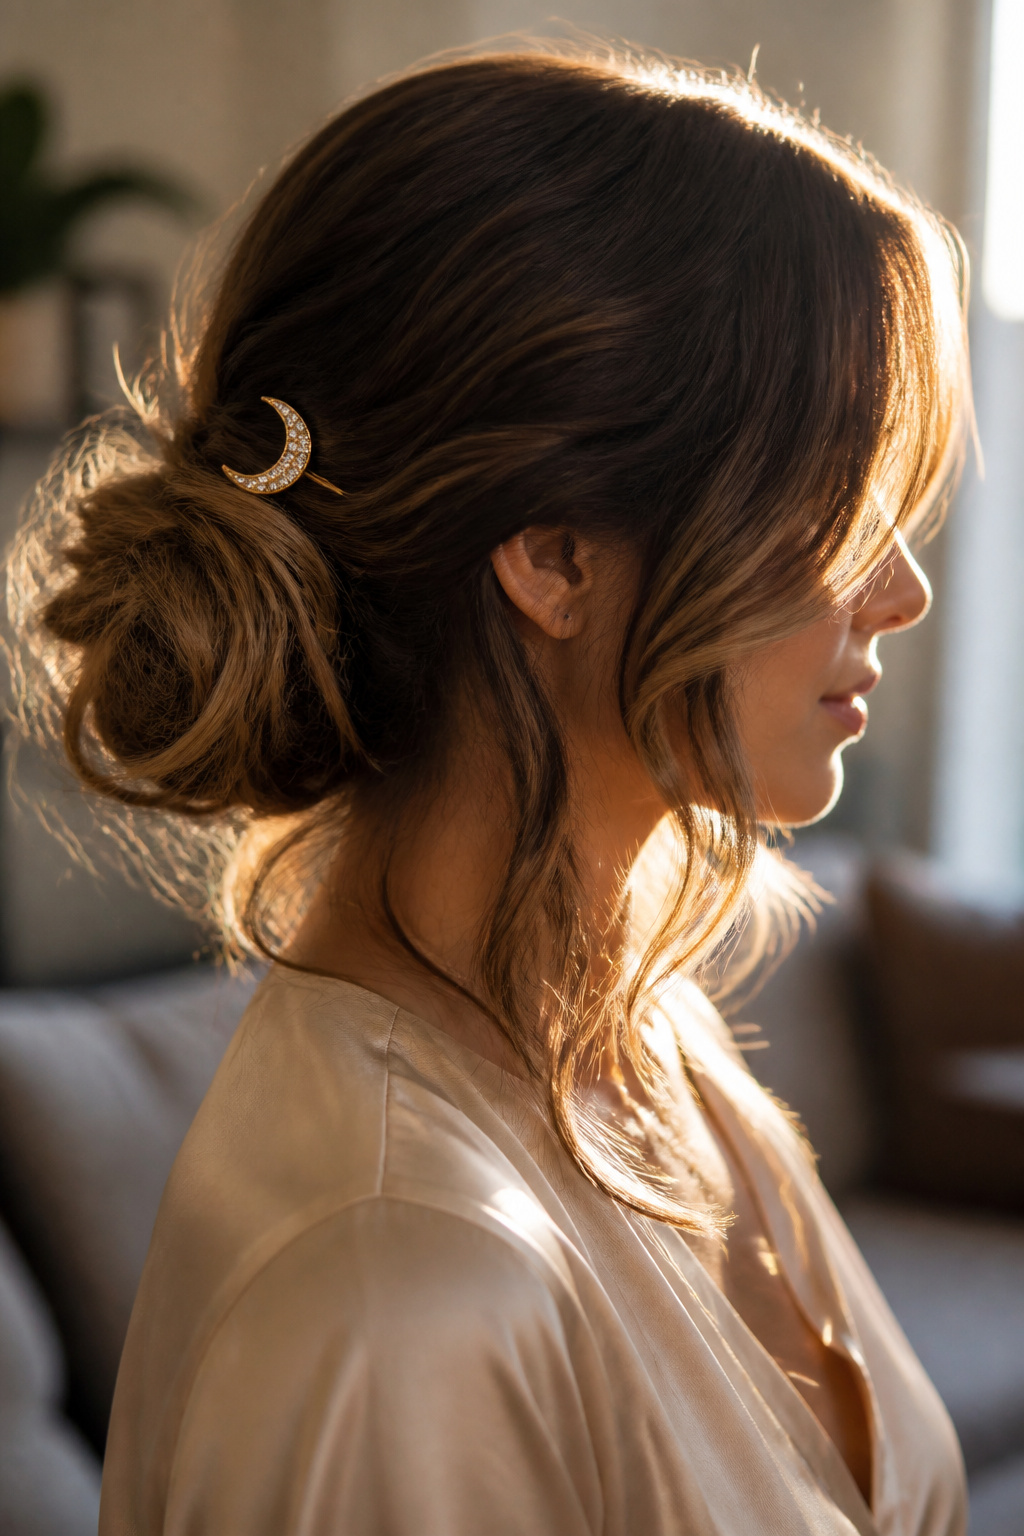

Best for long hair and medium density. Lasts through dinner and photos. About 5 minutes to pin.
A single statement jeweled clip at the side of a messy bun reads elevated. The visual payoff is glam without looking overdressed. This flatters round faces because the side placement creates asymmetry.
Avoid tiny stones that dull under light. Bigger, vintage-style clips show up in photos. I used a small dab of hairspray to keep flyaways down.
Velvet Ribbon Wrap with Tiny Skull Pins
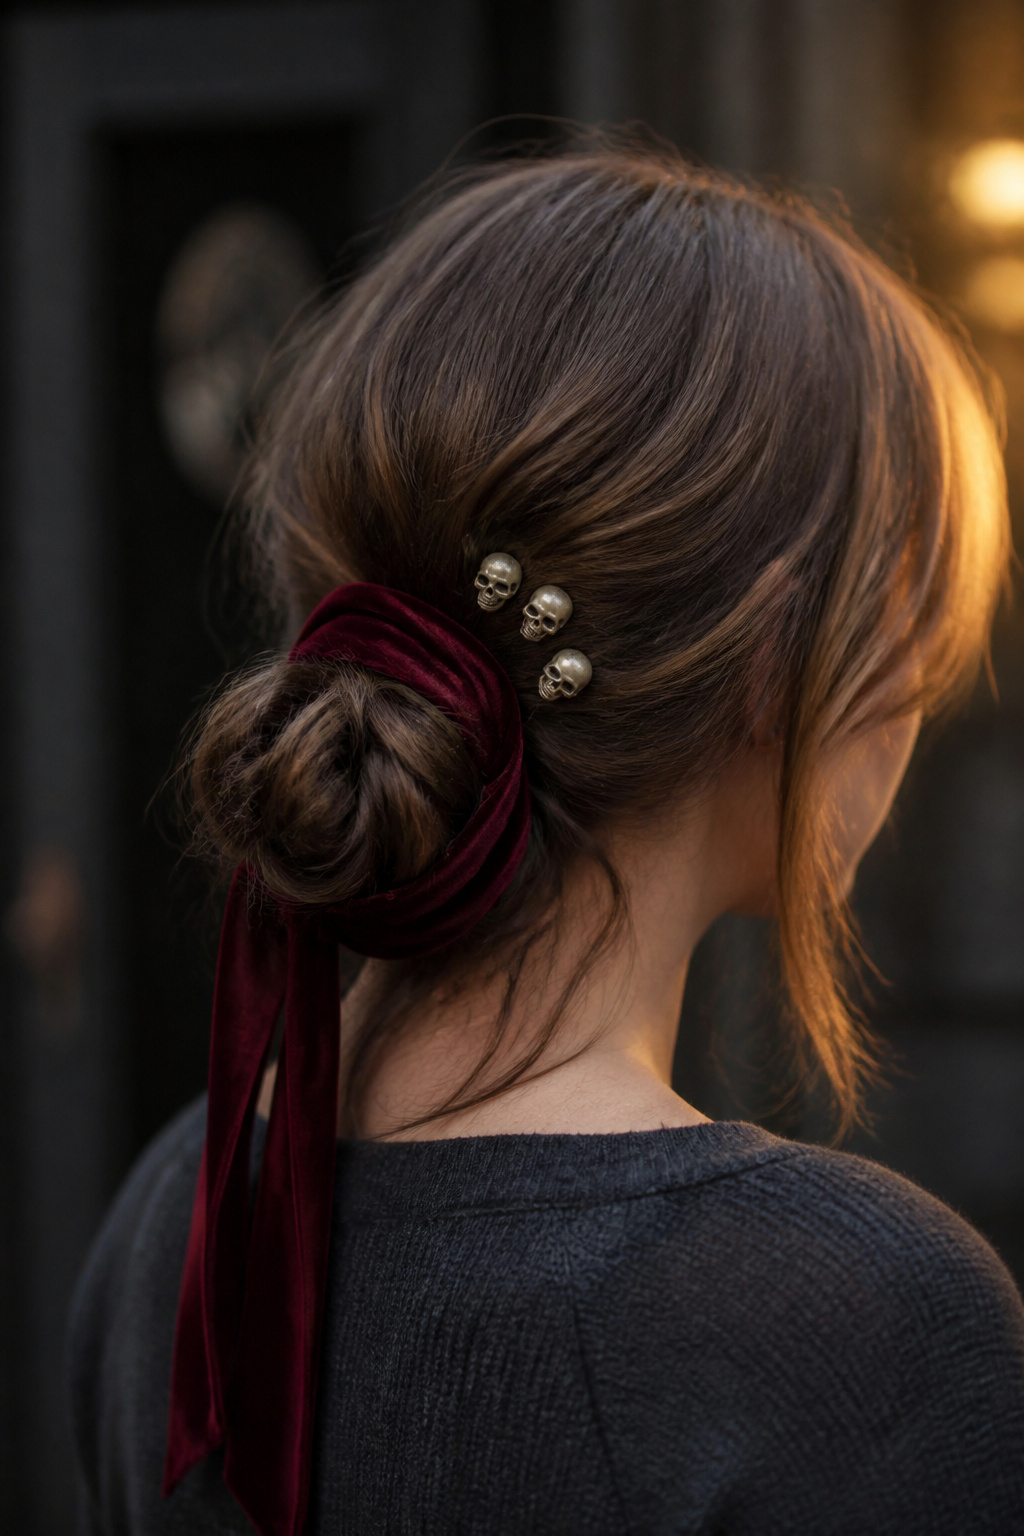

Best for shoulder-length hair. Rewraps easily when loose. About 6 minutes to wrap and pin.
Wrap a velvet ribbon once around a low messy bun and tuck in tiny skull pins along the knot. The ribbon softens the look while the pins give the Halloween note. This is a softer, romantic take that works for most face shapes.
A mistake I made was using a ribbon too narrow. Choose a ribbon that covers the elastic so the pins sit against fabric, not hair.
Braided Tie-Around with Spiderweb Pins
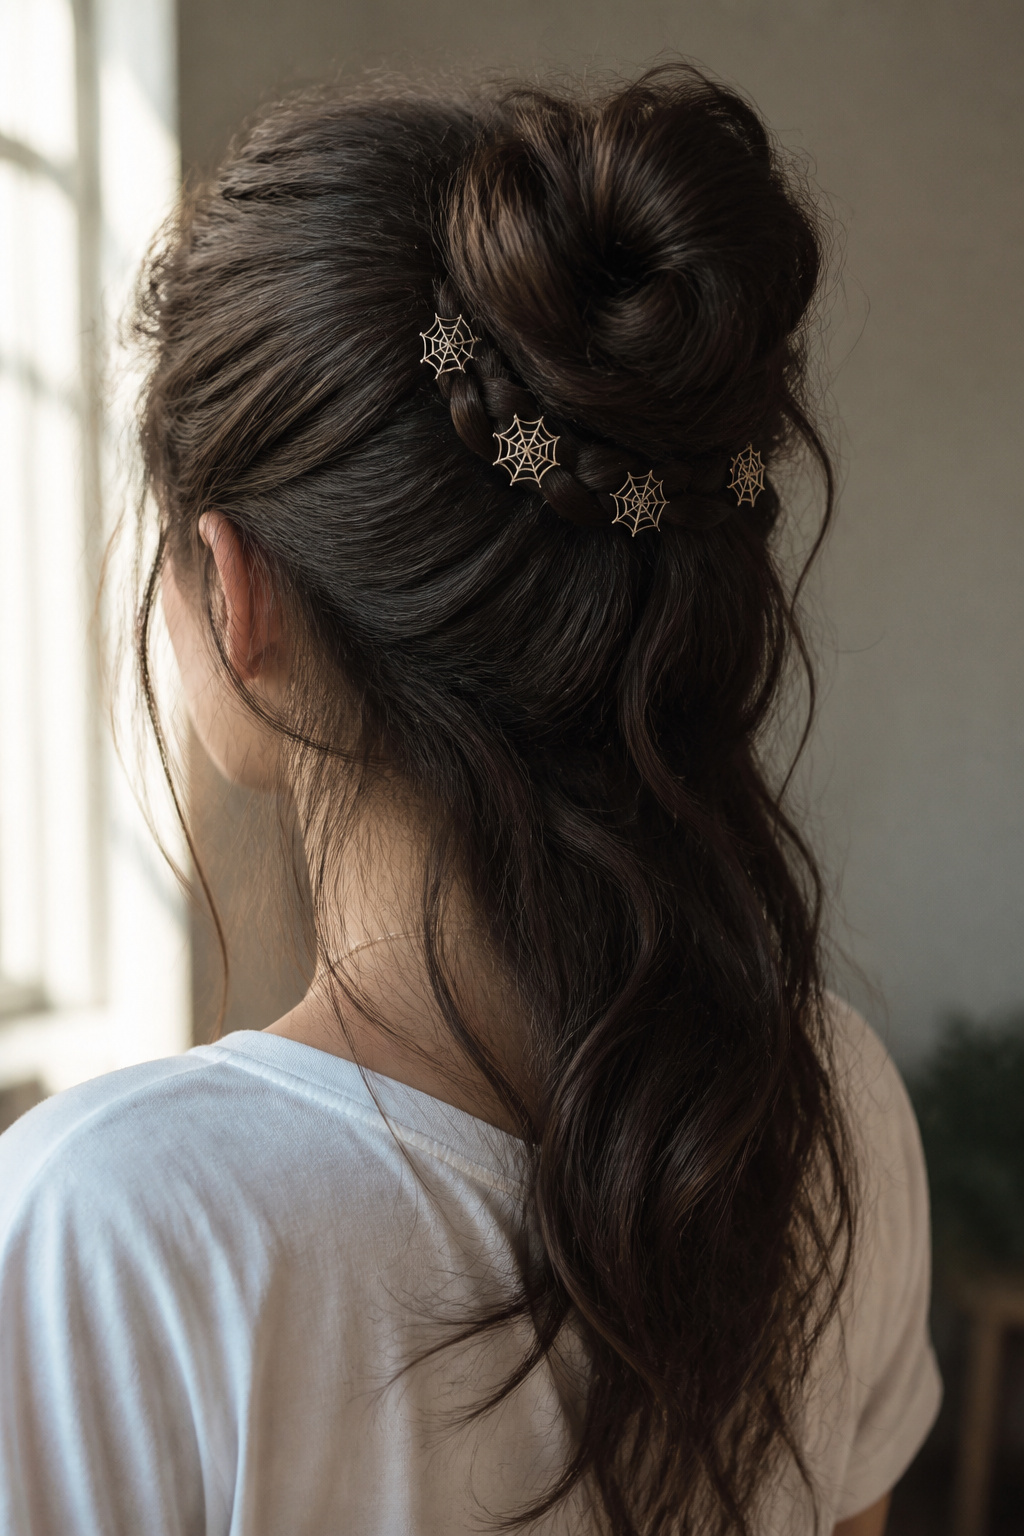

Best for long and thick hair. Keeps the bun tidy all day. About 7 minutes to braid and pin.
Braid a small section, wrap it around the bun, and secure with spiderweb pins. The braid hides the elastic and makes the clip placement read deliberate. This flatters long layers that might otherwise spill out.
Do not make the braid too thin or the pins will look accidental. I once braided a hair-thin section and the pins looked like afterthoughts.
Mixed Metal Bobby Pin Constellation
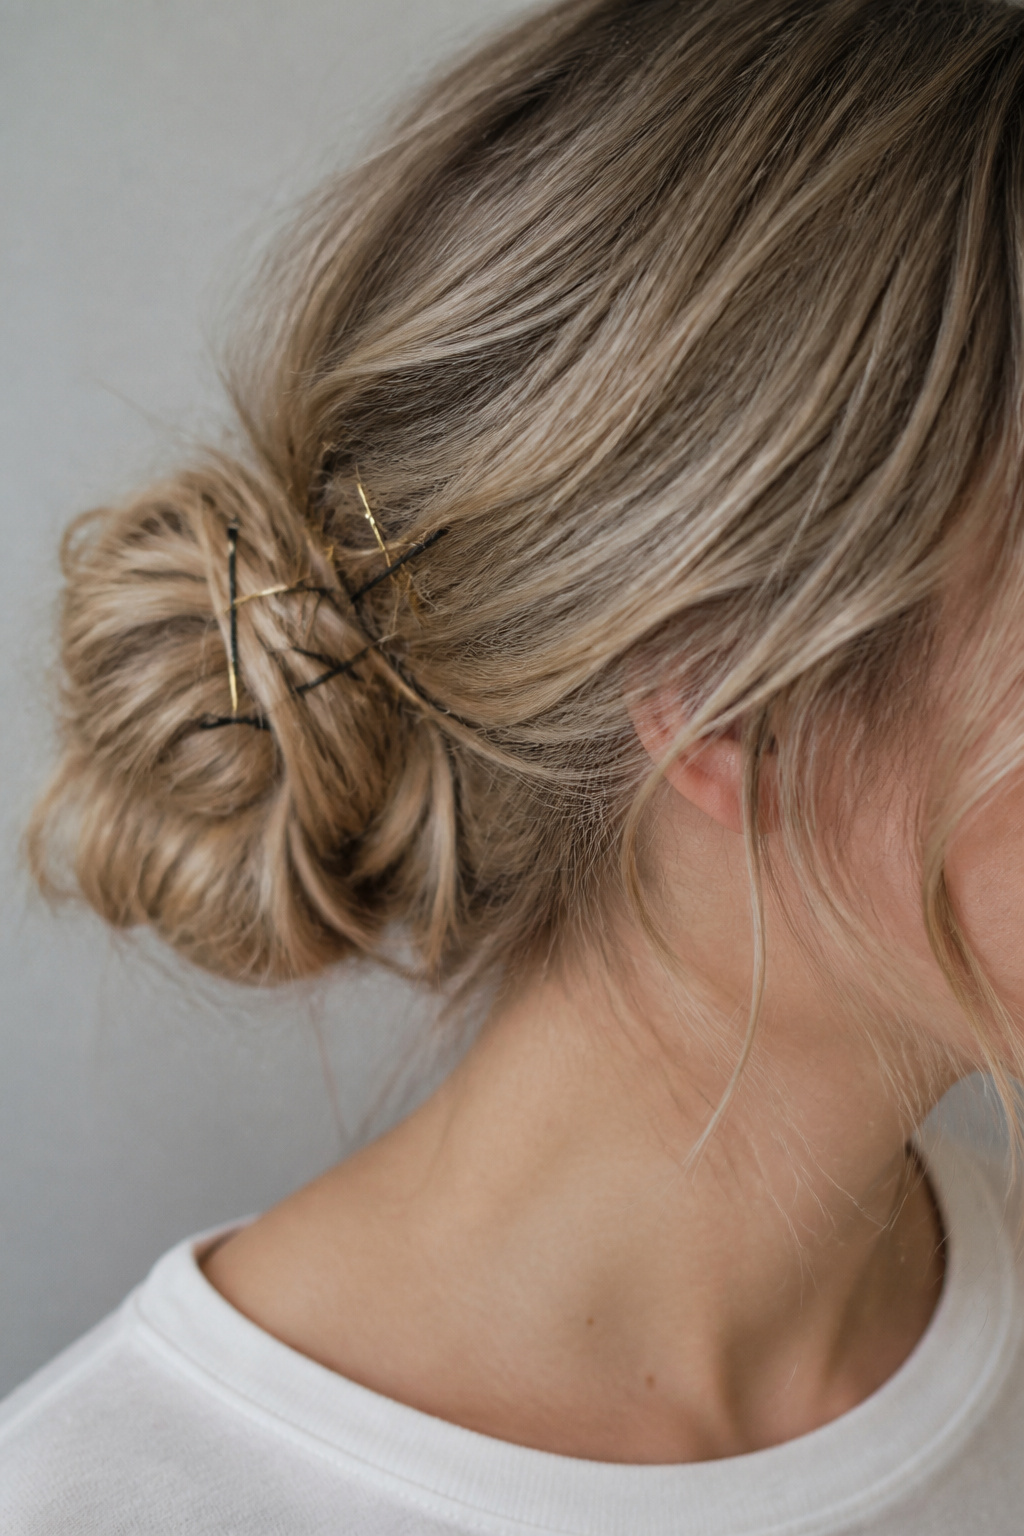

Best for fine hair. Easy to change daily. About 3 minutes to place pins.
Arrange different metallic bobby pins around the bun to catch light. The result appears deliberate and editorial. This flatters petite faces where heavy accessories would overwhelm.
Common mistake: using the same finish. Mixing metals reads richer. No clip required, just varied pins and a steady hand.
Mini Claw at the Crown for Instant Lift
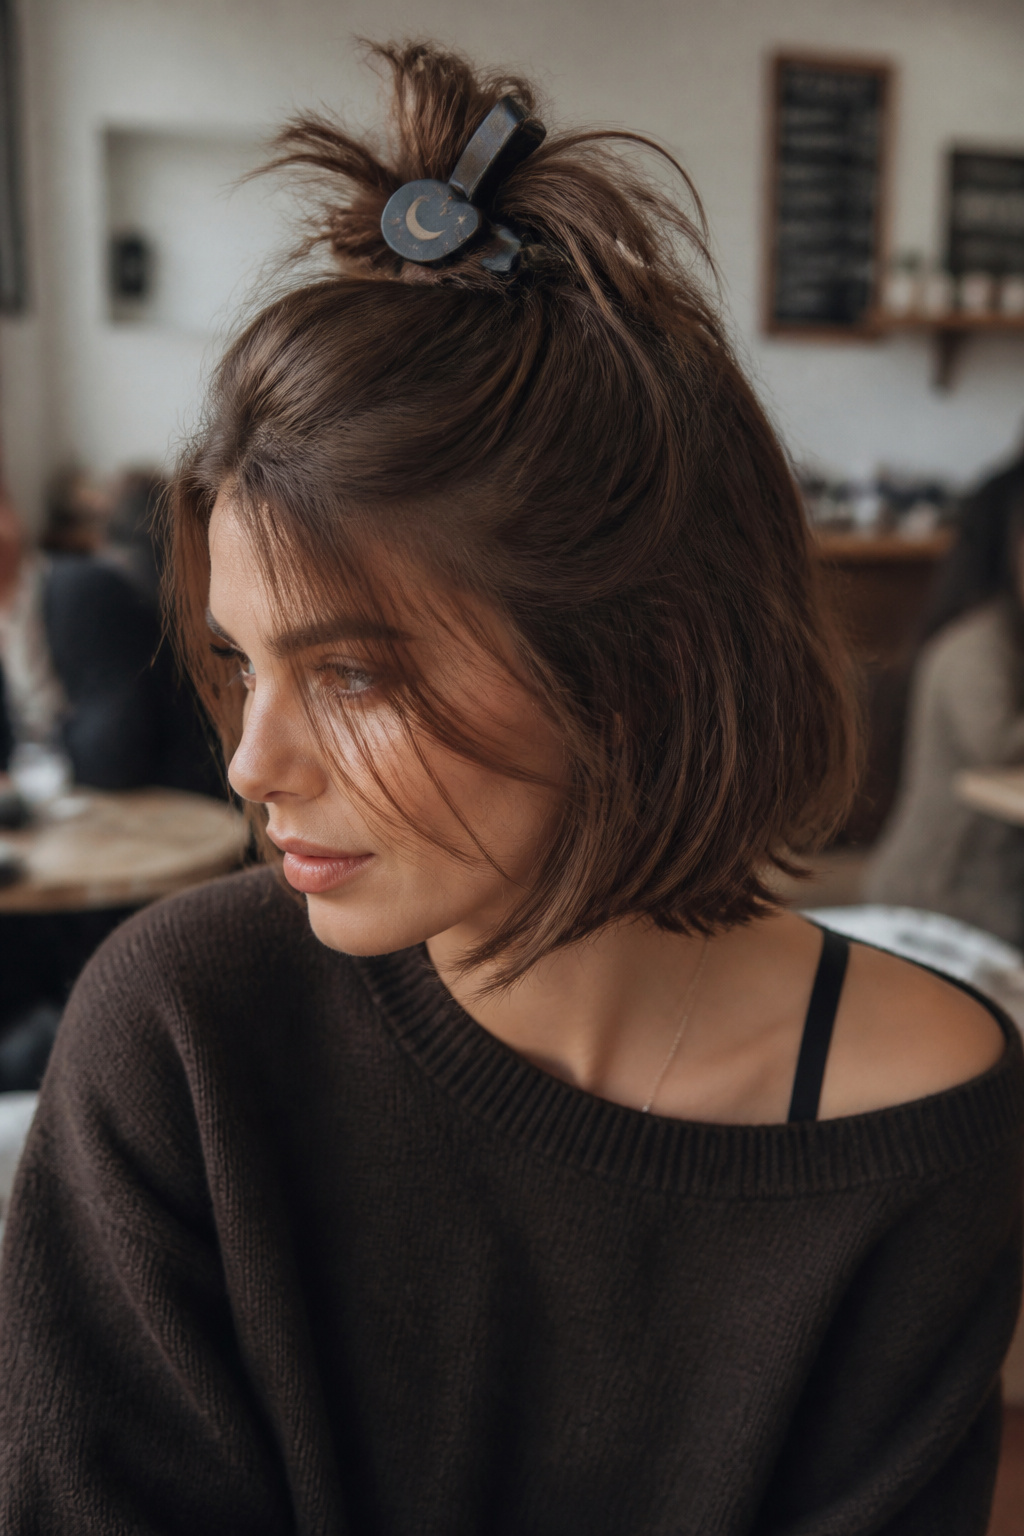

Best for short to medium hair. Adds quick height. About 2 minutes to set.
Pop a mini claw at the crown of a messy top knot to create the illusion of more volume. The payoff is instant lift and a front-heavy focal point. This flatters round faces by elongating the silhouette.
If you push the claw too far back it collapses. Anchor closer to the hairline for lift. I keep a small claw clip pack in my bag for emergencies.
Safety-Pin Punk Chain for Side Bun
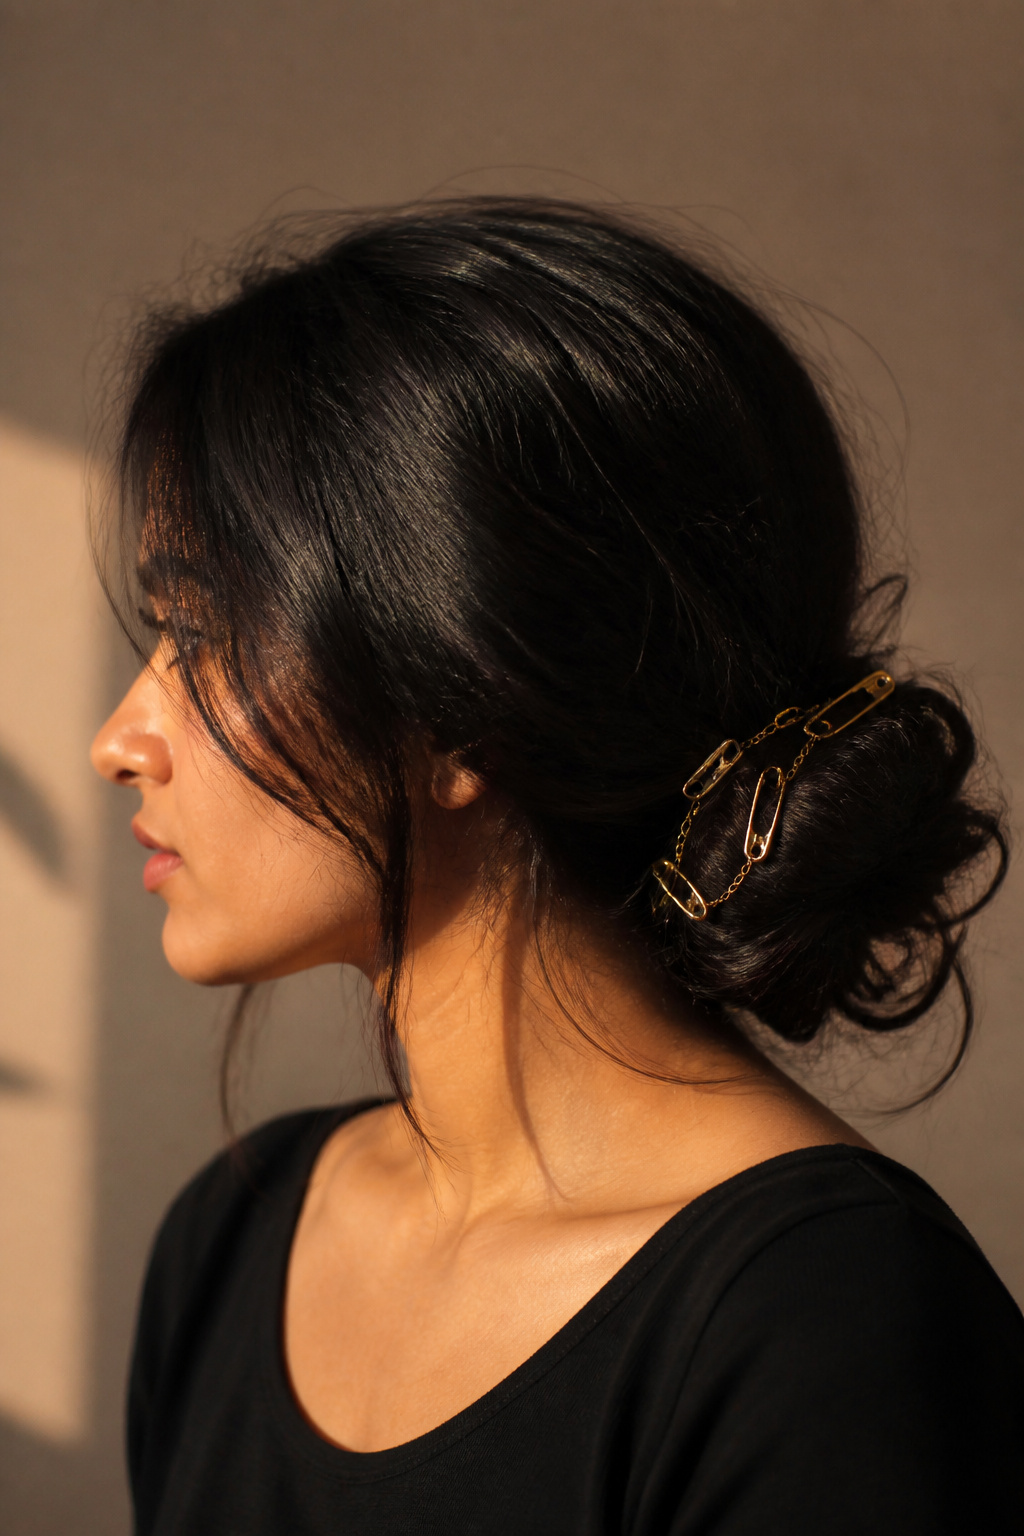

Best for medium to thick hair. Great for nights out. About 6 minutes to position chain.
Weave a short safety-pin chain along the bun’s curve for a punk silhouette. The technique is to attach the chain to two anchor pins on opposite sides of the bun so it drapes. This flatters square faces by softening the jaw with curves.
Avoid heavy chains on fine hair. I learned this when a heavy chain pulled my bun apart mid-event. Use light decorative clips instead.
Vintage Comb Tuck for Gothic Romance
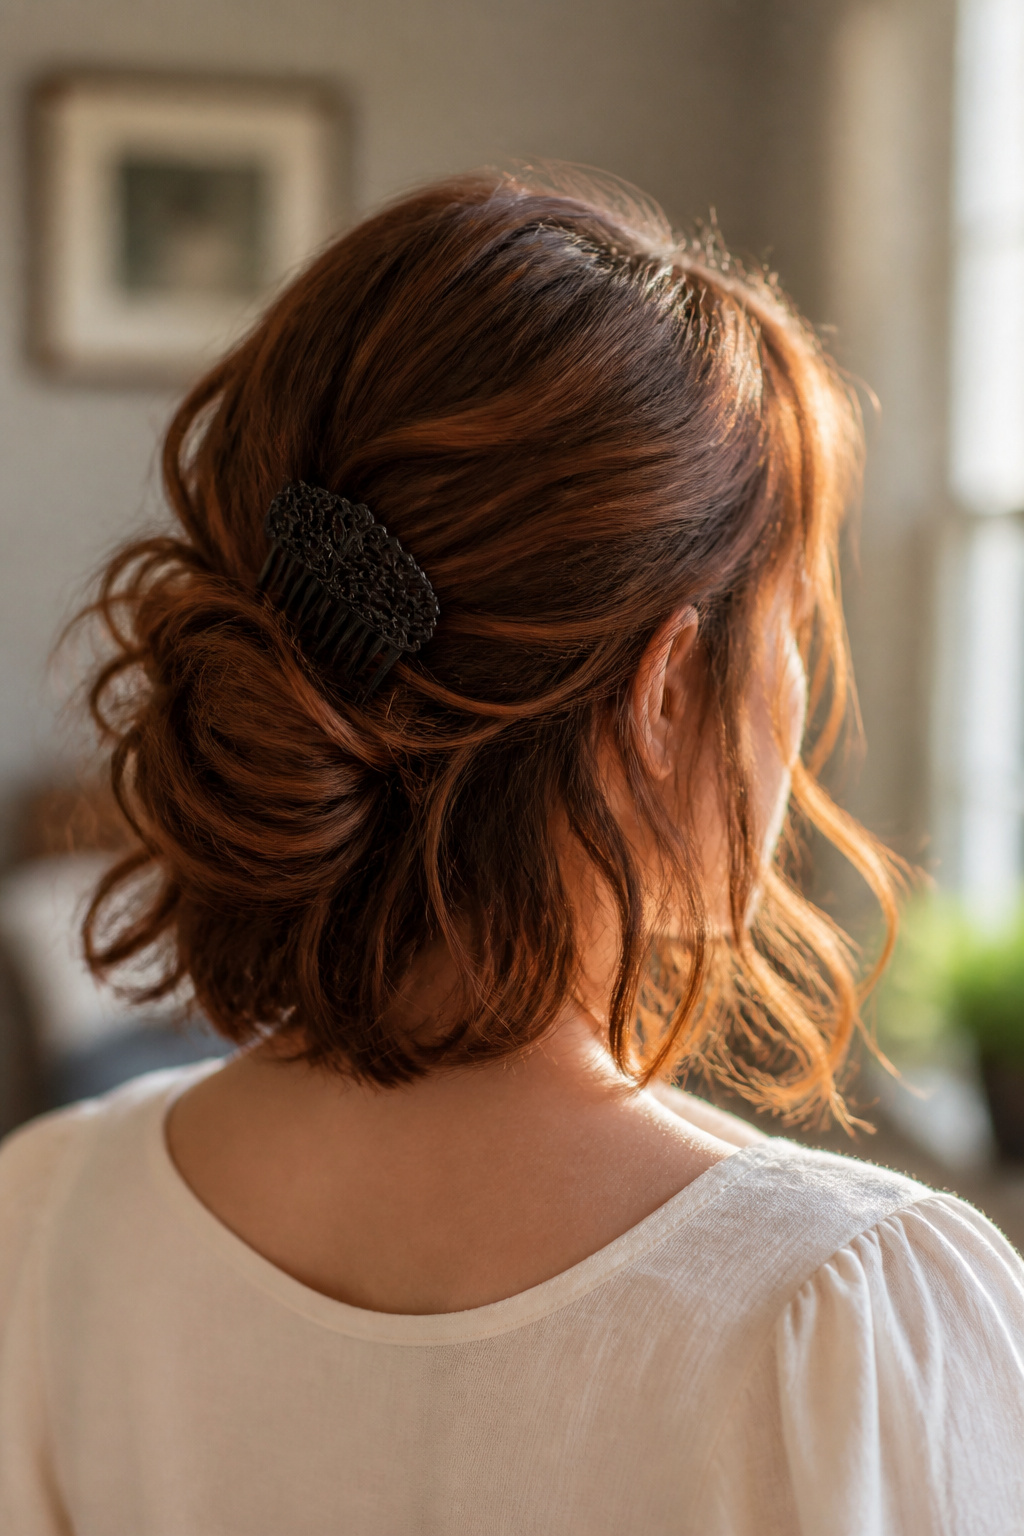

Best for shoulder-length hair. Grows out neatly. About 4 minutes to tuck and secure.
A vintage comb slid into the top edge of a messy chignon gives a timeless, slightly gothic lift. The comb reads elevated and deliberate. It flatters oval faces and works well with choppy layers.
Don’t cram the comb in flat. Angle it slightly so teeth bite into the base. A light mist of hairspray helps it stay.
What You'll Need to Get This Look
Heat Tools
- 1.25-inch ceramic curling wand ($25 to $40)
- 1-inch titanium flat iron ($45 to $90)
- Diffuser attachment hair dryer ($10 to $30)
Styling Products
- Texturizing spray, 6oz ($12 to $25)
- Light hold hairspray, 250ml ($8 to $20)
- Heat protectant serum, 3.4oz ($10 to $25)
Hair Care and Protection
- Silk scrunchie set, 4 pack ($8 to $18)
- Wide tooth comb for detangling ($5 to $12)
Accessories and Finishing
- Skull and spider hair clip set ($12 to $30)
- Mixed metal bobby pin pack, 100 count ($6 to $15)
- Small claw clip pack ($5 to $12)
- Jeweled crescent barrette ($10 to $30)
Budget Swaps
- Drugstore texturizing spray ($6 to $12)
- Economy dry shampoo can ($4 to $10)
- Value pack plain bobby pins ($3 to $8)
Shopping Tips for These Looks
Buy themed clips in multipacks: You get variety and can mix finishes. I grabbed a set of enamel clips during a sale and used them across three looks. Try this skull and spider clip set.
Save on tools during holiday sales: Devices drop noticeably in November. I waited and picked up my curling wand with a 25 percent discount, and it paid off.
Use drugstore dupes where it counts: A drugstore texturizing spray is fine for most of these looks. I keep a cheap can for rehearsals and a nicer one for nights out. See drugstore texturizing spray.
Match clip weight to hair density: Heavy metal clips need thicker hair. If you have fine hair, look for lightweight enamel or plastic clips like a small claw clip pack.
Frequently Asked Questions
How do I stop clips from slipping in fine hair?
Anchor them to an elastic or a small braid first, then slide the clip on. A dab of texturizing spray at the roots helps. Try texturizing spray, 6oz.
Can I wear these clips with curly hair?
Yes. Embrace texture. Use a diffuser to dry and then place clips gently so they do not flatten curls. A lightweight heat protectant serum helps before any hot styling.
Are metal clips damaging long term?
Only if they snag hair. Smooth edges and fabric-backed clips are kinder. Silk scrunchies reduce breakage around elastics; see silk scrunchie set.
Which clips photograph best at night?
Jeweled and glossy enamel pieces catch light and read well in photos. A jeweled crescent barrette is a simple pick that shows up in flash.
Where to Start
If you want one easy switch, swap ordinary bobby pins for a mixed metal pack and scatter them around a low messy bun. It is the fastest way to make a regular morning bun look styled without trying too hard. Which clip are you trying first this season?


